How to Export and Import Ignition MES Schedules Between Gateways
Introduction: Streamlining Schedule Migration
Prerequisites: Preparing Your Gateways for Migration
Completing these prerequisite steps is essential to prevent file system errors and data conflicts during the migration process. Careful preparation on both the source and target gateways lays the foundation for a successful transfer.
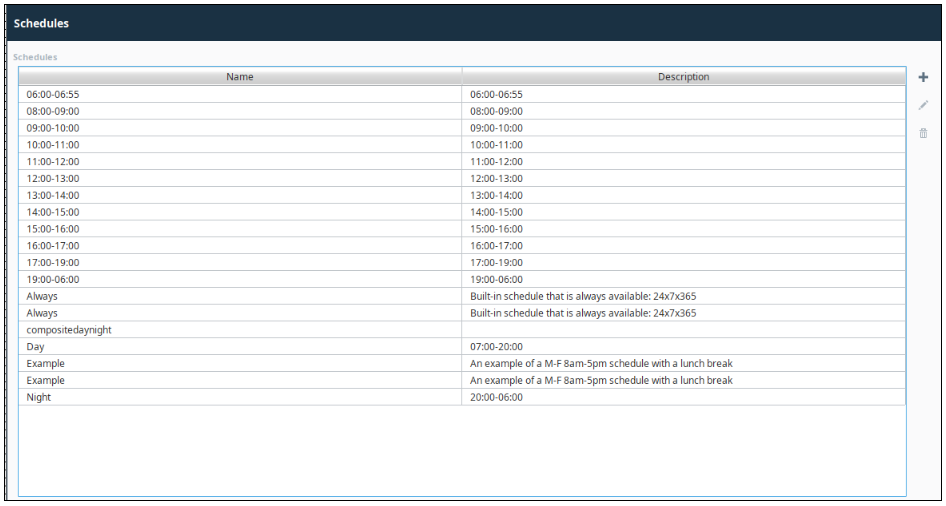
On the Source Gateway: Sanitize Shift Names
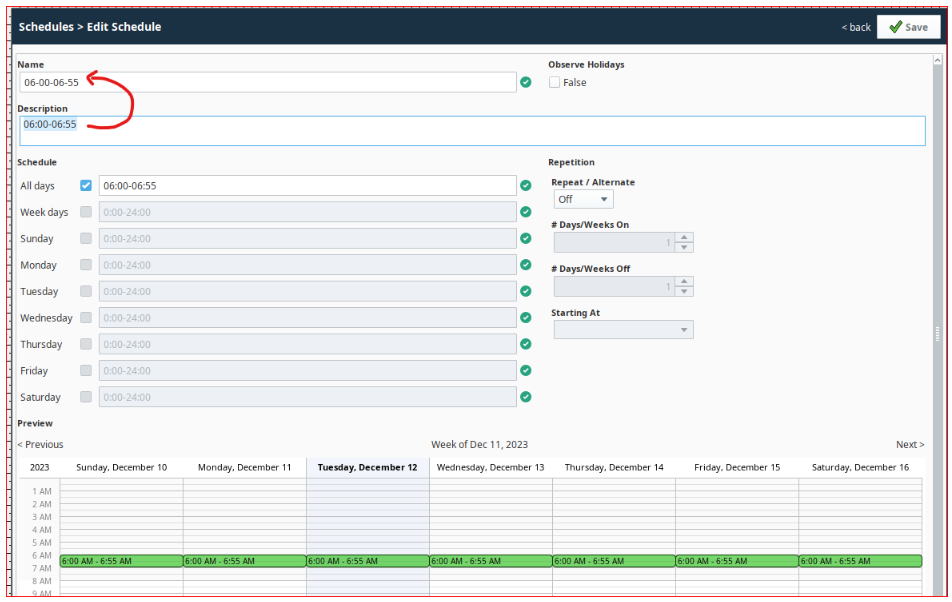
Before running the export script, you must review all schedules within the Ignition Shift Manager on your source gateway. Any shift times that contain a colon (:) must be manually updated to use a hyphen (-) instead.
Example: A shift time of 06:00-06:55 must be updated to 06-00-06-55.
This manual update is a critical data governance step. While the export script includes a function to replace colons when creating filenames, modifying the schedule name at the source ensures that the data is consistent within the MES database itself. Relying solely on the script's file-level replacement can lead to mismatches between the schedule's name on the gateway and its corresponding backup filename.
On the Target Gateway: Remove Default Schedules
Step 1: Exporting Schedules from the Source Gateway
The export script automates the process of extracting schedule configurations. It programmatically iterates through all available MES schedules on the source gateway, serializes each one into a Java object, and saves it as an individual file in a specified directory on the local file system.
Export Script
Python |
from java.io import FileOutputStream, ObjectOutputStream |
Executing the Script
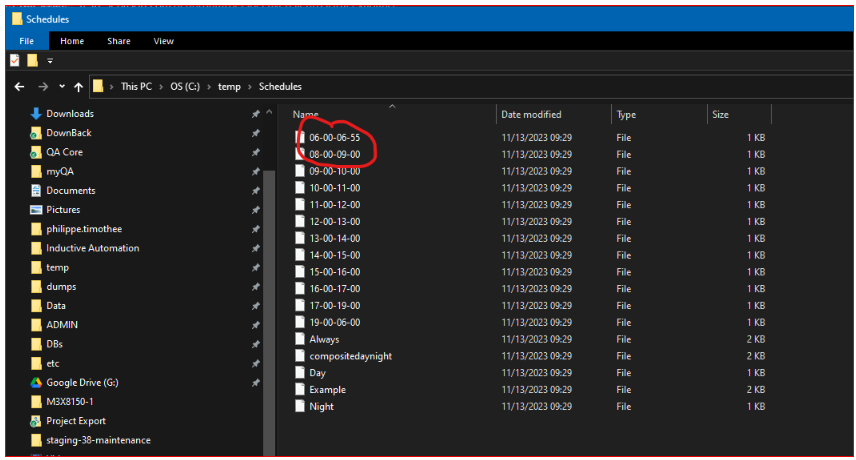
Open the Script Console in the Ignition Designer connected to your source gateway. Copy and paste the entire export script into the console and execute it. The script will create a file for each schedule in the C:\Temp\Schedules\ directory.
Analysis of the Export Script
- Path Definition: The script saves files to a hardcoded path (
C:\\Temp\\Schedules\\). You may need to modify this path to a directory that exists and is accessible on your source gateway machine.
- Schedule Retrieval: The
system.user.getSchedules()function is used to fetch a list of all schedule objects currently configured on the gateway.
- Filename Sanitization: The line
schedule.name = schedule.name.replace(':',"-")acts as a programmatic safeguard to ensure any remaining colons are replaced with hyphens, creating a valid filename for the Windows file system.
- Object Serialization: The script uses Java's
FileOutputStreamandObjectOutputStreamto write the completescheduleobject to its own binary file. This process, known as serialization, preserves the entire state and structure of the object for later use.
Step 2: Importing Schedules to the Target Gateway
The import script effectively reverses the export process. It reads the serialized schedule files from the specified directory, reconstructs the schedule objects, and uses a system function to add each schedule to the target gateway's configuration.
Import Script
Python |
from java.io import FileInputStream, ObjectInputStream |
Executing the Script
First, ensure the schedule files exported from the source gateway are present in the directory specified in the script (C:\\Temp\\Schedules\\) on the target gateway machine. Next, open the Script Console in the Ignition Designer connected to your target gateway. Copy and paste the import script into the console and execute it.
Analysis of the Import Script
- File Iteration: The
os.listdir(path)function iterates through every file found in the specifiedpath.
- Object Deserialization: The script uses Java's
FileInputStreamandObjectInputStreamto read the binary data from each file and reconstruct (deserialize) it back into a fully functionalscheduleobject in memory.
- Schedule Creation: The
system.user.addSchedule(schedule)function is the core of the import process. It takes the deserializedscheduleobject and adds it to the target gateway's user source, making it visible in the Shift Manager.
Step 3: Finalizing the Migration