Add Work Orders and Schedules
Complete the following steps using the 02_Production Control screen recently configured:
Create and Schedule a Work Order
Reminder: Change the Start Date and End Date values for both the MES Schedule View and MES Schedule Selector components to show today through a few days from now, so you can see your work order data (and have some room to schedule production runs out into the future).
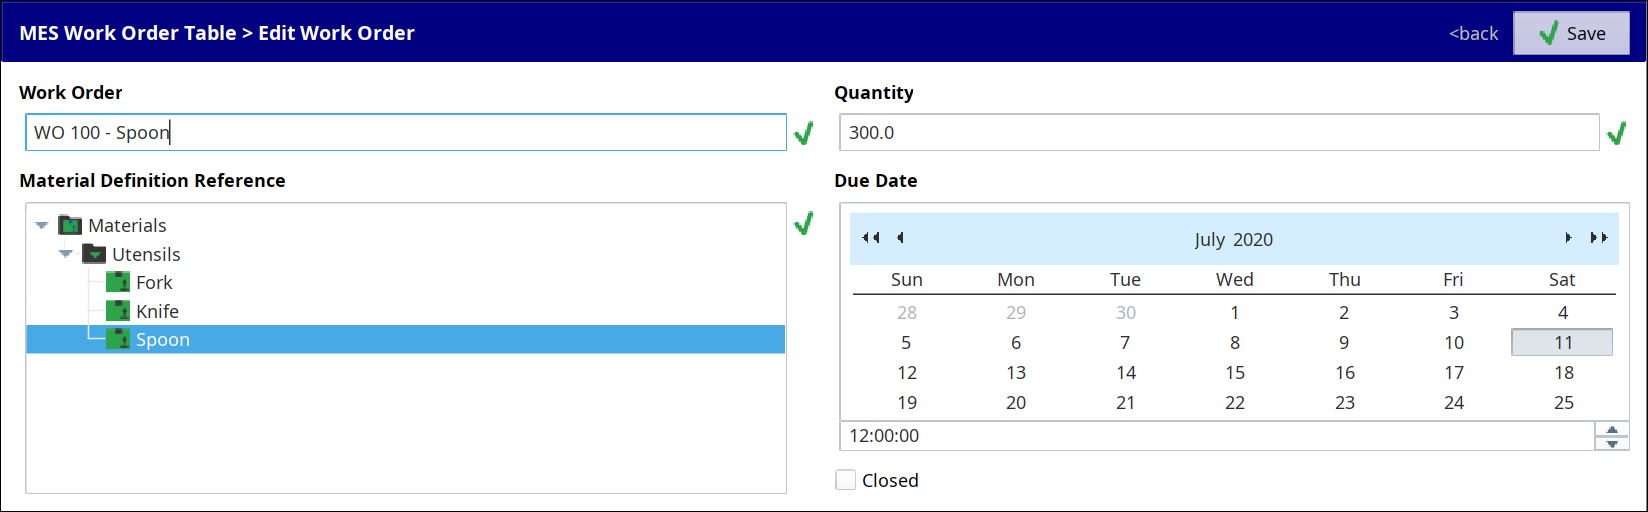
In the MES Work Order Table, create several new Work Orders for different Materials of various quantities. For quantity, use a value of several hundred units, so the scheduled time span isn't just a thin 'stick' on the MES Schedule View component later on.

Remember to hit Enter (or move to another field) after changing the Due Date's Time field, else when you hit Save, it will not save the new time.
 → Enter → Save
Schedule a production run by dragging and dropping one of your work orders from the MES Work Order Table down onto the MES Schedule View component, onto the desired production Line, at some spot on the timeline ahead of the current time marker line (can't manufacture things in the past unless you set the Past Scheduling Enabled property checkbox). Configure the production run in the dialog box that appears as follows:
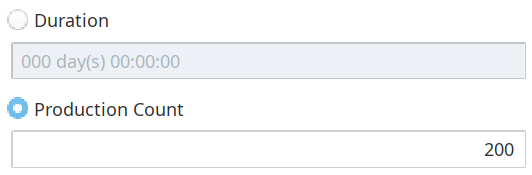
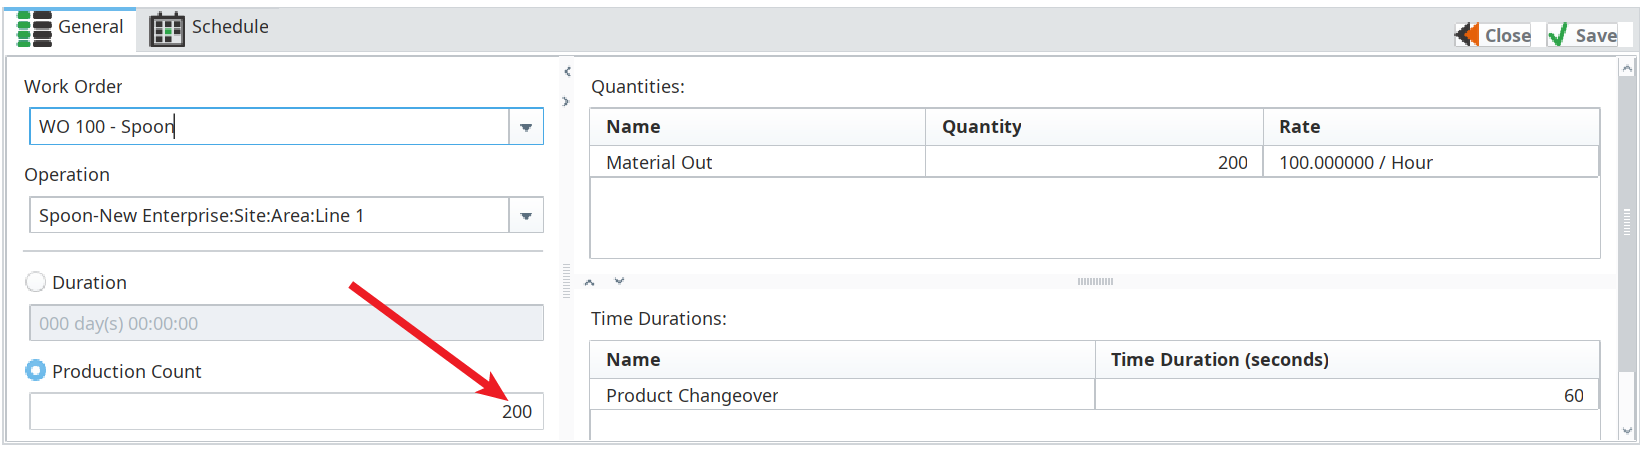
In the General tab, reduce the Production Count to a smaller quantity than your entire Work Order Quantity.
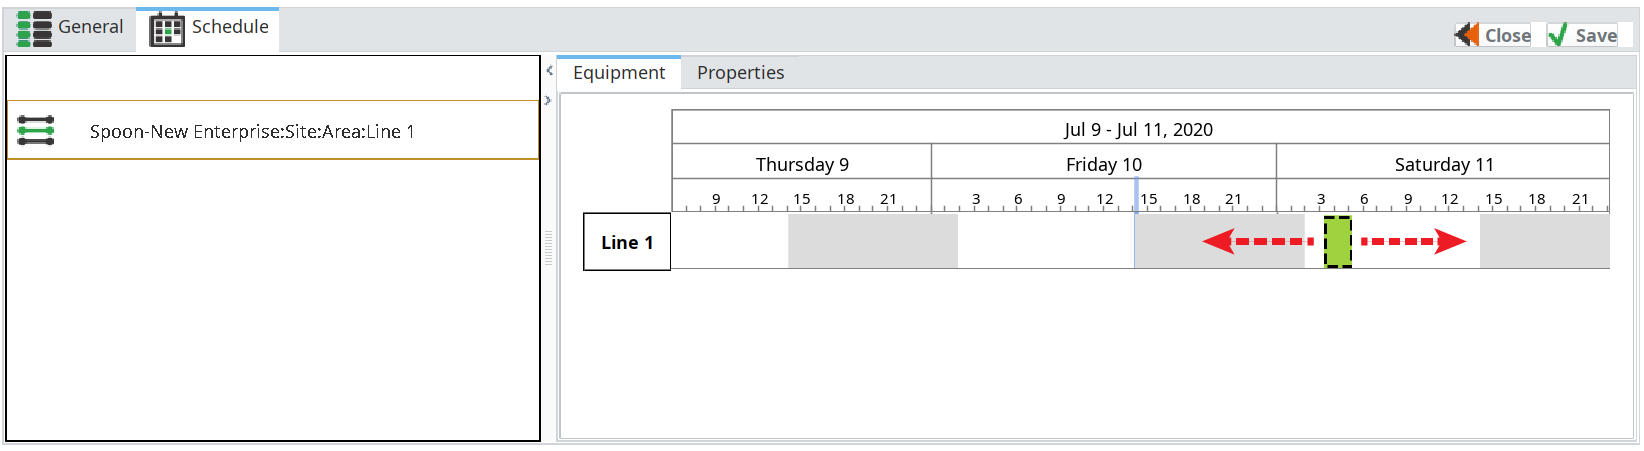
In the Schedule tab, observe that you can click and drag the production run along the timeline. Change or leave the run's schedule as desired.
Click Save.
The General tab allows you to decide whether to:
- Make a fixed quantity of items, regardless of the production time required (less than or equal to the quantity specified in the work order), – or –
- Run production for a specific duration, regardless of the final quantity achieved (production will end early if all units specified in the work order are processed).
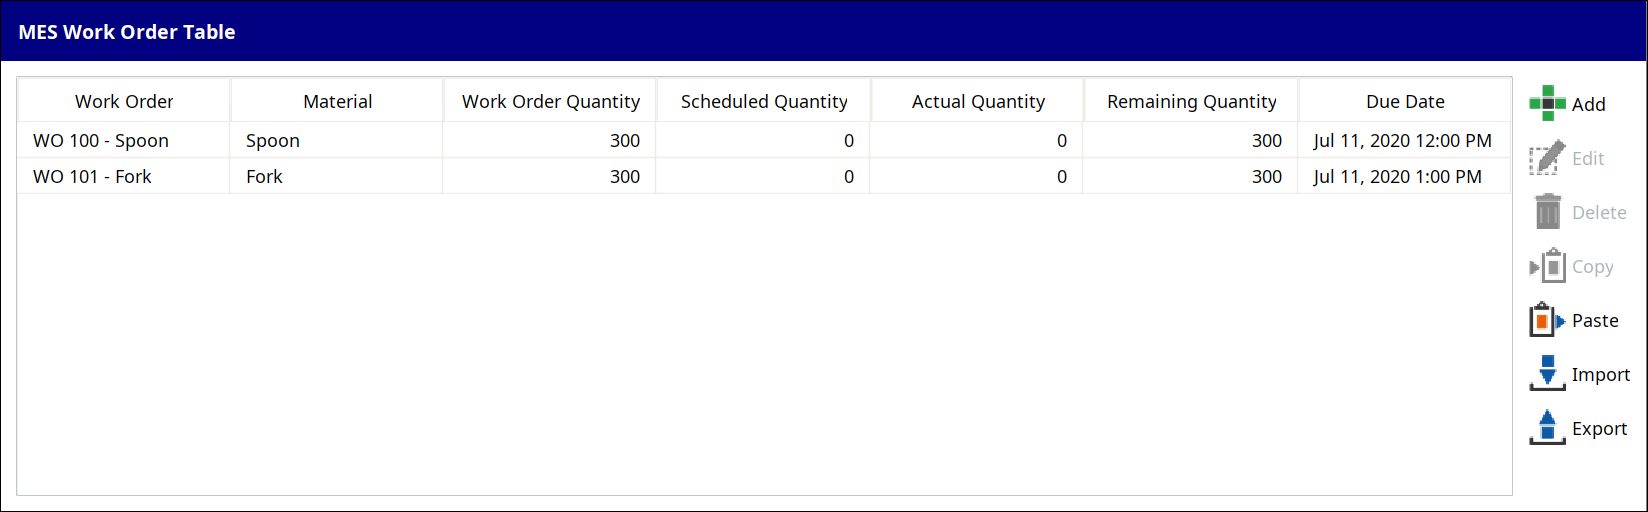
Note the updated Scheduled Quantity in the MES Work Order Table:


Run a Work Order
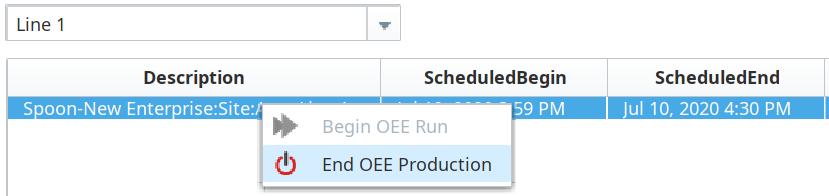
You can override the planned start time for scheduled Work Orders using the MES Schedule Selector. By right-clicking on a Work Order, you can begin its production run immediately (see image to the right) or end an active run.
|
|
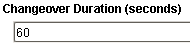
The Changeover Duration property, configured in the Material Manager for the Material Definition you created earlier (default = 60 seconds) is what the scheduling components on this screen will use.
|
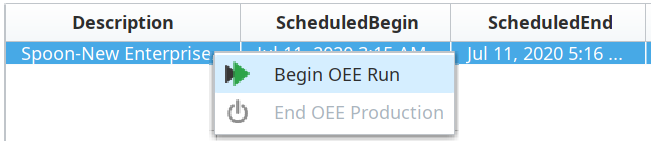
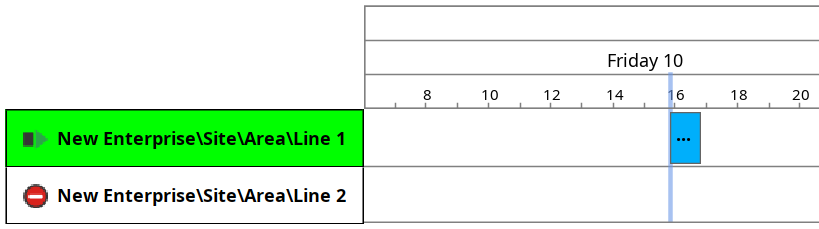
- Right-click on a Work Order in the the MES Schedule Selector and select Begin OEE Run. Notice that your scheduled run gets pulled in to the present-time mark in the MES Schedule View component and your active Line now has a small changeover icon:
 At the conclusion of the configured Changeover Duration for the material being run, the active Line turns green, indicating it is now in production.
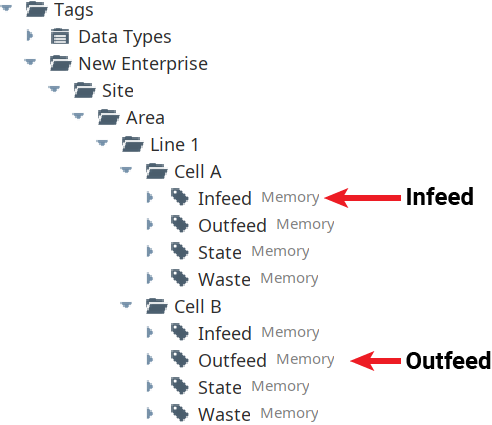
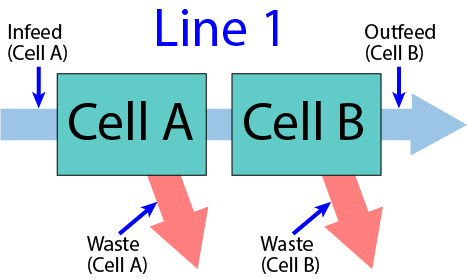
 - Open the Tag Browser to the Tags for Cell A and Cell B of the Line you are running your material on. Manually change the Memory Tag values as described below, to simulate material moving through the two Cells of your production line:
- Increment the Infeed counter for Cell A, then increment the Outfeed counter for Cell B (one unit successfully manufactured).
- Increment the Infeed counter for Cell A, then increment the Waste counter for either Cell A or Cell B (unit rejected), to simulate a rejected part at one or the other Cell.
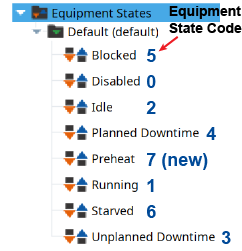
- Change the State tag for either Cell A or Cell B to another state (example: 2 for Idle or 6 for Starved, or use the new state you created earlier). Wait a few seconds then change it back to 1 again (Running).
Repeat the above steps multiple times, to simulate your production line producing some successful parts, some rejected parts on both cells, and also cycling through several Equipment States besides 1 (Running) on the two Cells.
Optional Counter Spinners
To make incrementing and changing the Tags easier, you may elect to drop a copy of the template Counters onto a temporary new screen. Refer to the Optional Counter Spinners section below.
Repeat the step above several times, to generate some 'good' units and some 'reject' units.
- Note the Work Order Actual Quantity and Quantity Remaining updates on this screen as units are 'produced' by incrementing the counter Tags (there is a short delay in updating the quantities). Furthermore, note the progress update on your scheduled production run in the MES Schedule View component.
- Right-click on the running Work Order in the the MES Schedule Selector and select End OEE Production. Note that the scheduled production run disappears from the MES Schedule Selector and the remaining portion of the production time block disappears from the MES Schedule View. Also, the active Line is no longer green.
- Run one of your other Work Orders on the other Line for practice. Increment the counters (for that line), as directed above, and observe the changes to quantities and states on the components.

Optional Counter Spinners
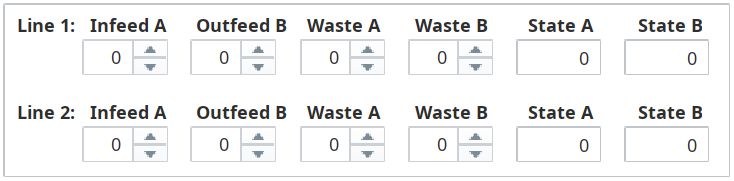
You'll be simulating the Infeed, Outfeed and Waste counters incrementing, as well as State changes, as you perform simulated production runs. Binding the Memory Tags for these onto Ignition Spinner components and Numeric Text Field components makes it more convenient to simulate your runs. You can modify the Tags directly from the Tag Browser as well, if you prefer to skip this step.
- Drag the pre-configured Counters template from the Templates folder onto a temporary new screen. You can use the spinners and fields for simulating your production runs easier.
![]()