Simple Batch Recipe using a Value Prompt and User Message
This recipe takes an operator input and based on that input the recipes ends or loops back. A message is provided to the operator.
The timer executes based on the seconds set in a parameter and then a Boolean parameter set to True by an operator before the recipe ends.
- Navigate to Recipe Editor.
- In the header on the right, click the Plus icon > Create Recipe Class. Name it Training. This is simply a folder for organization.
- Click the Training recipe class, and click the Plus icon > Create Recipe.
- Name it: messages.
Recipe-level Parameters
The recipe definition information displays first when you create a recipe. After saving the recipe, you can access this information by click the Gear icon in Edit Recipe page. This is where recipe-level parameters are managed.
- Under Parameters, click the Plus icon. Add a parameter named input. Set the parameter props as shown in the screenshot. The definitions are given below. This parameter will be referenced in the Value Prompt phase.
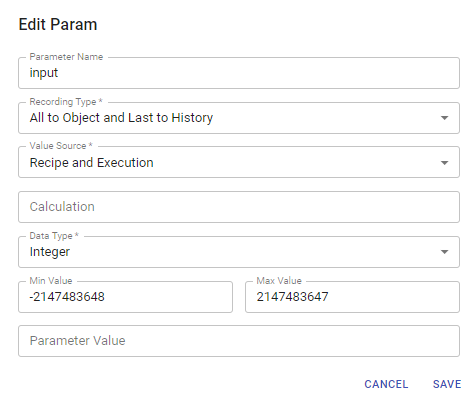
Property Settings to remember:
Recording Type: Required
This defines when and if values are saved to the database. Saving to history provides values for analysis. Saving to object ensures the continuity of operation.
For each type's purpose and data storage method, see Recording Type in Phase Parameter Properties.
Value Source: Required
Sets when and where parameter values come from. Recipe gets the value before the batch goes into state running state. Recipe and Execution get values before and during execution.
For a definition of each of the options: 'recipe', 'execution', 'recipe and execution', 'monitor', and 'synchronization manager', see Value Source in Phase Parameter Properties.
- Click the checkmark icon in the upper right to save the work done here.
Author the Recipe
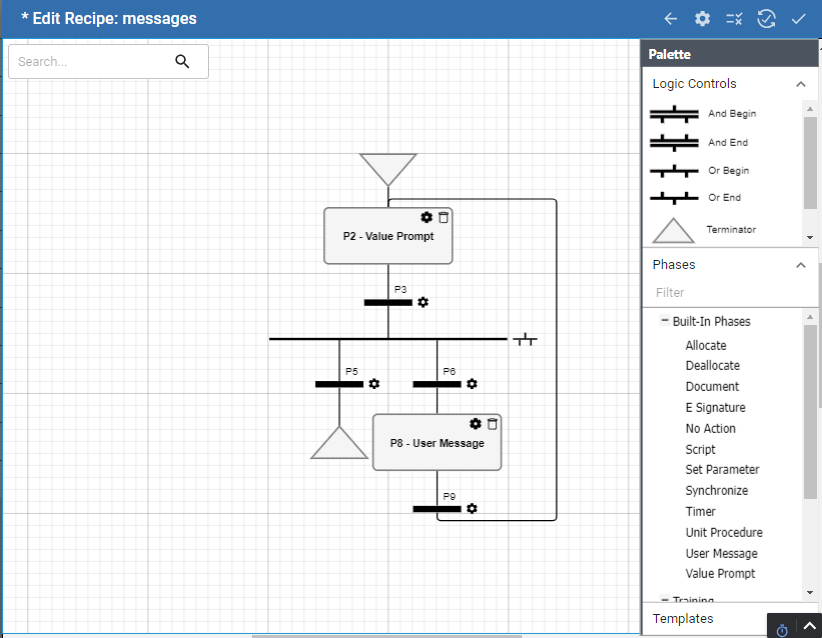
The Start logic control is given to you in the design space. Now you will add other logic controls to build the recipe.
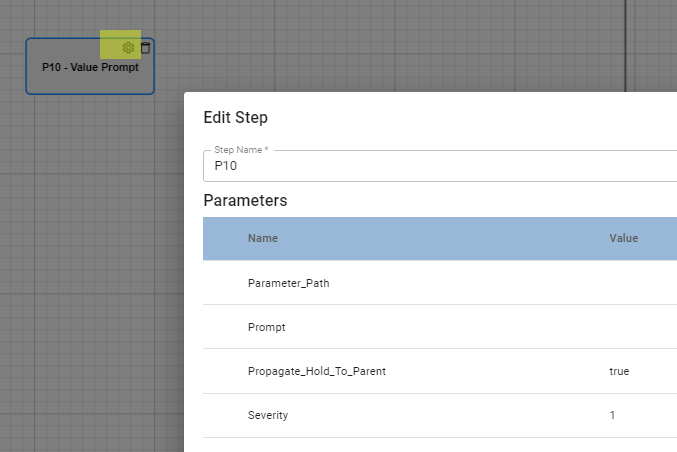
- Under Palette, go to Phases > Built-In Phases and drag and drop a Value Prompt to the design space.
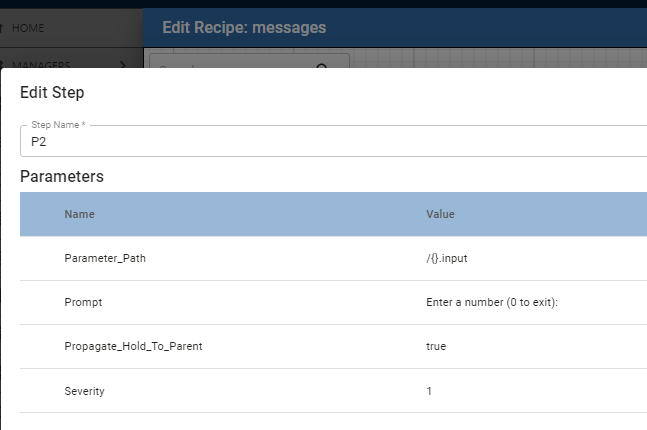
- Click the Value Prompt gear icon to open its settings.
- For Parameter_Path, enter /().input
For Prompt, enter: Enter a number (0 to exit).
- Add a Transition. Save: P2.Complete
- Add an Or_Begin with 2 Transitions. These transitions act as gates for the execution. If any number other than '0' is entered the recipe loops.
- Execution is evaluated from left to right. Add /{}.input = 0 to the first Transition and /{}.input != 0 to the second.
- Execution is evaluated from left to right. Add /{}.input = 0 to the first Transition and /{}.input != 0 to the second.
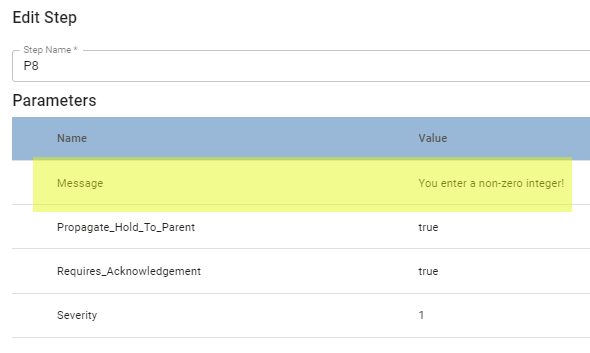
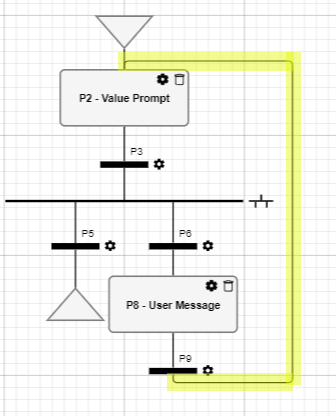
- Add a Terminator under the left-side Transition and a User Message phase under the right-side Transition.
- Add a message value to the Message parameter.
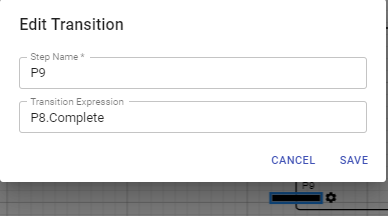
- Add a Transition under the user message phase and set its transition expression to: p8.Complete.
- Drag the connector line up to the top and drop above the value prompt phase.
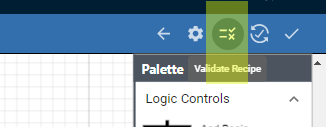
- Ready to validate recipe. In the top right, click the Validate icon. If you have errors, the messages will help you trouble shoot. Validate until the Validation Successful message.
Go to Batch Execution and Monitoring in the UI Batch Execution and Monitoring in the UI
Reference Documentation:
- Batch Recipe Authoring
- Using Batch Recipe Editor
- Batch Recipe Editor Component Reference
- Batch Procedure Phases | Base Phases