Create Sample Definition
Let's create a Sample Definition that has three Sample Attributes, using the SPC Sample Definition Manager window we created on the previous page. We'll utilize it in an upcoming section, to collect some sample data values.
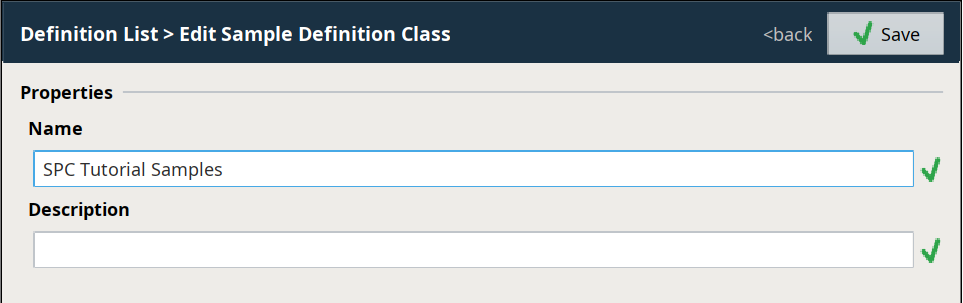
Create a Sample Definition Class
- In Preview mode, click New Sample Definition Class in the SPC Sample Definition Manager component.
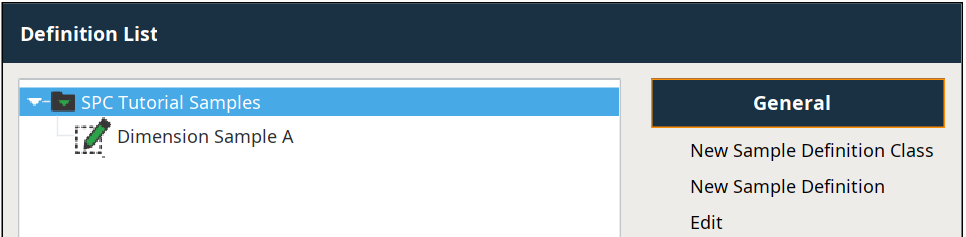
- Name it SPC Tutorial Samples and click Save. The new Sample Definition Class will be at the top of your hierarchy tree, as shown to the right.
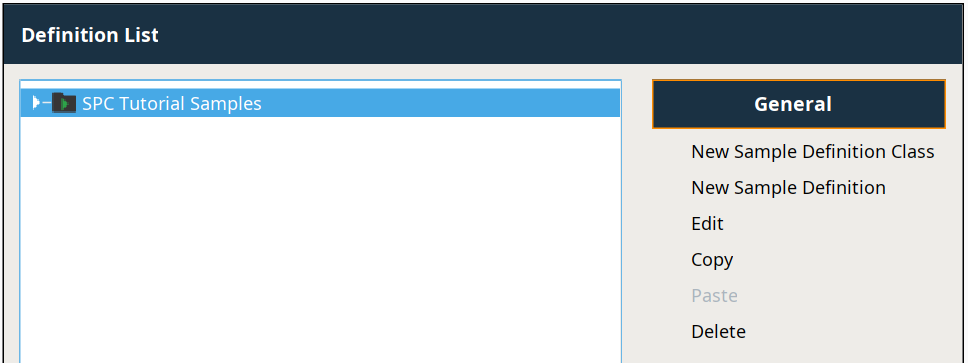
Create a Sample Definition
- With the new Sample Definition Class highlighted, click New Sample Definition. Enter the following properties:
- Name: Dimension Sample A
- Interval Type: Every Value Change
- Auto Approve: Unchecked (remove check mark)
- Click Save. The new Sample Definition will be a child element to SPC Tutorial Samples, as shown to the right.
Create Sample Attributes
- With Dimension Sample A highlighted, click Attribute List in the Sample Definitions Settings section.
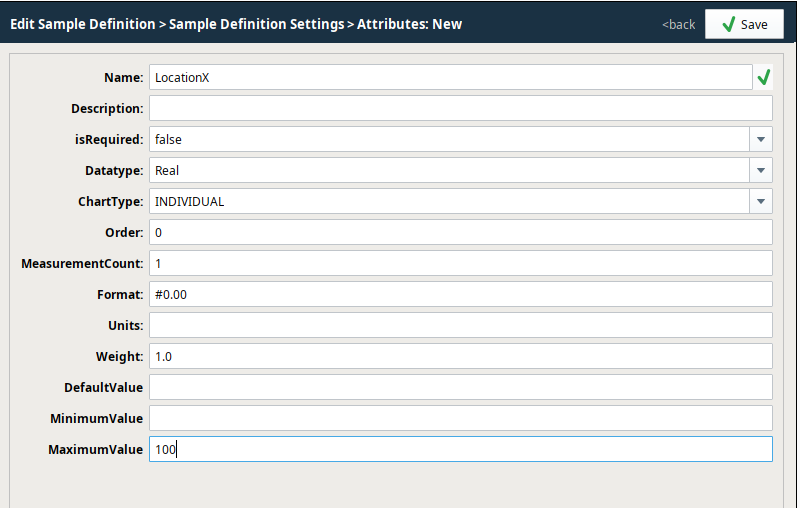
- Click New (
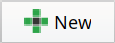 ) to create a new Attribute. Enter the following properties:
 - Name: LocationX
- Datatype: Real
- ChartType: Individual
- MeasurementCount: 1
- MaximumValue: 100.0
- Format: #0.00
- Units: mm
- Click Save. The new Attribute will be visible in the list.
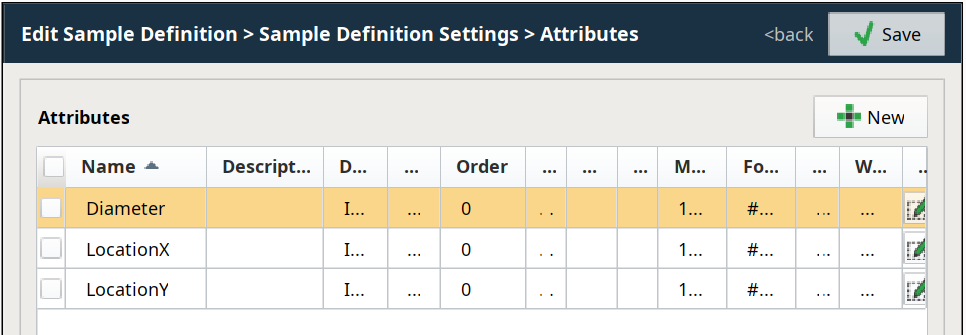
- Repeat steps 2-3 above to create the remaining two attributes, LocationY and Diameter with the same properties. You should end up with three Sample Attributes in the list, as shown to the right.
- Click Save to save and exit editing Attributes.
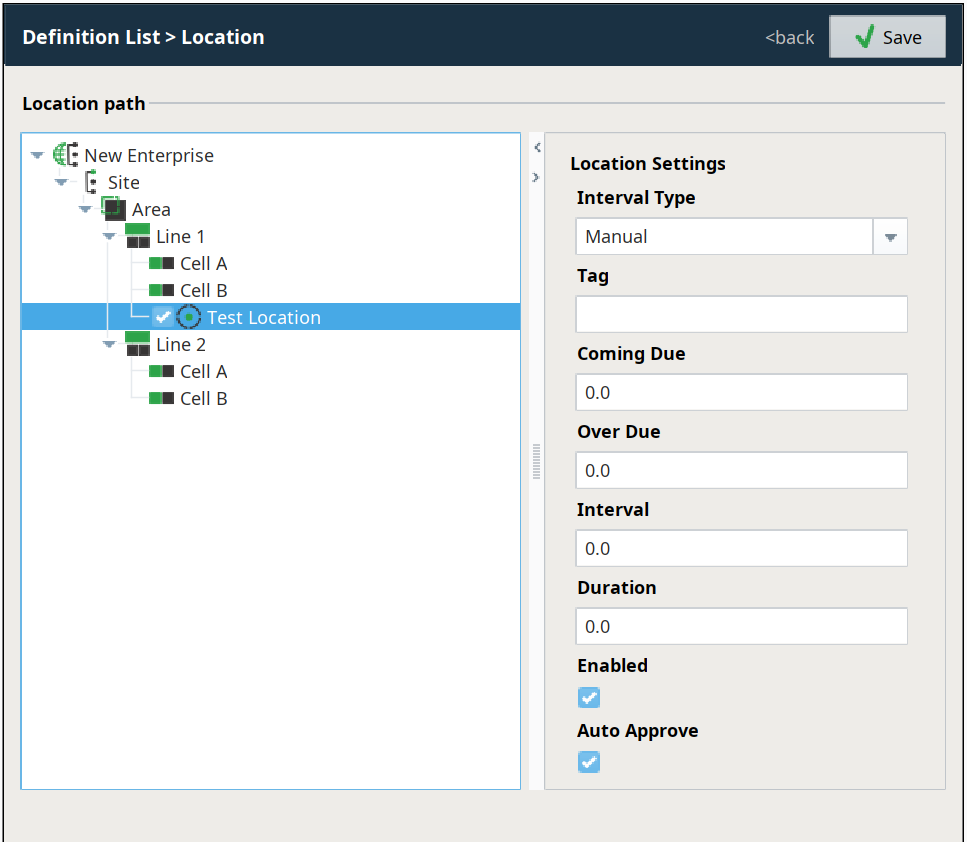
Assign Location
- With Dimension Sample A highlighted, click Locations in the Sample Definitions Settings section.
- Click to place a checkmark to the left of Test Location under Line 1. This assigns the Location to to Sample.
- Enter the following properties under Location Settings on the right:
- Interval Type: Every Value Change
- Enabled: True (should already be checked)
- Auto Approve: True (should already be checked)
- Click Save to save and exit editing Locations.
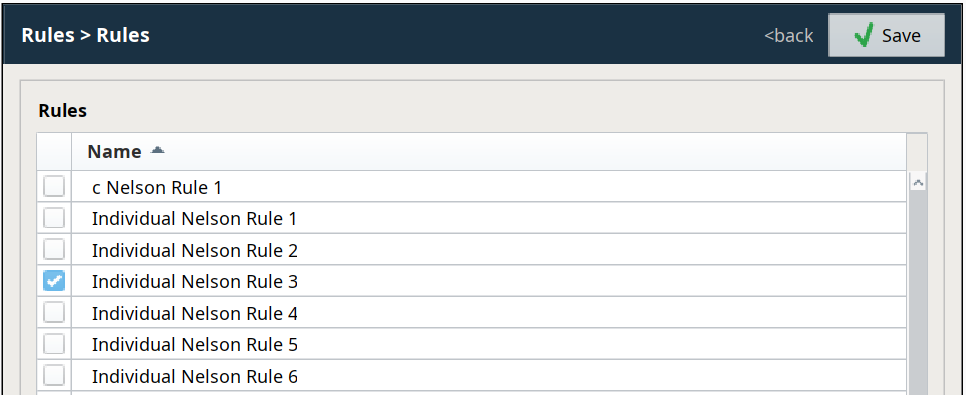
Assign Rules
- With Dimension Sample A highlighted, click Rules in the Sample Definitions Settings section.
- Click the checkbox next to Individual Nelson Rule 3 to select it.
- Click Save to save and exit editing Rules.
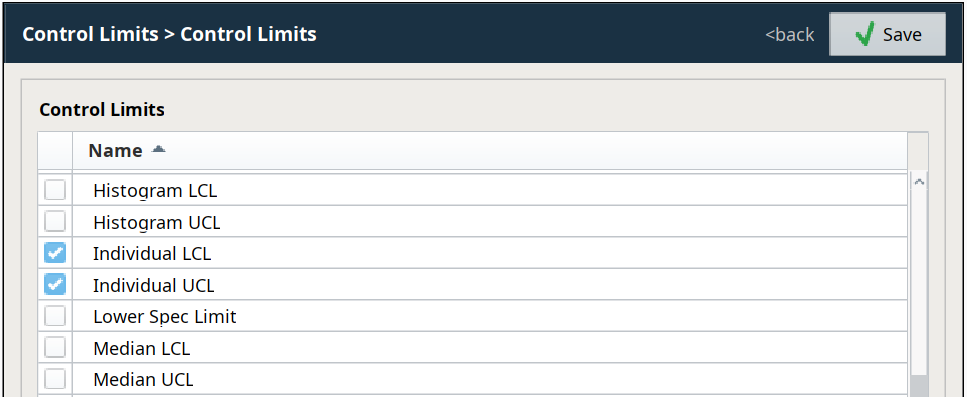
Assign Control Limits
- With Dimension Sample A highlighted, click Control Limits in the Sample Definitions Settings section.
- Click the checkboxes next to Individual LCL and Individual UCL to select them.
- Click Save to save and exit editing Control Limits.