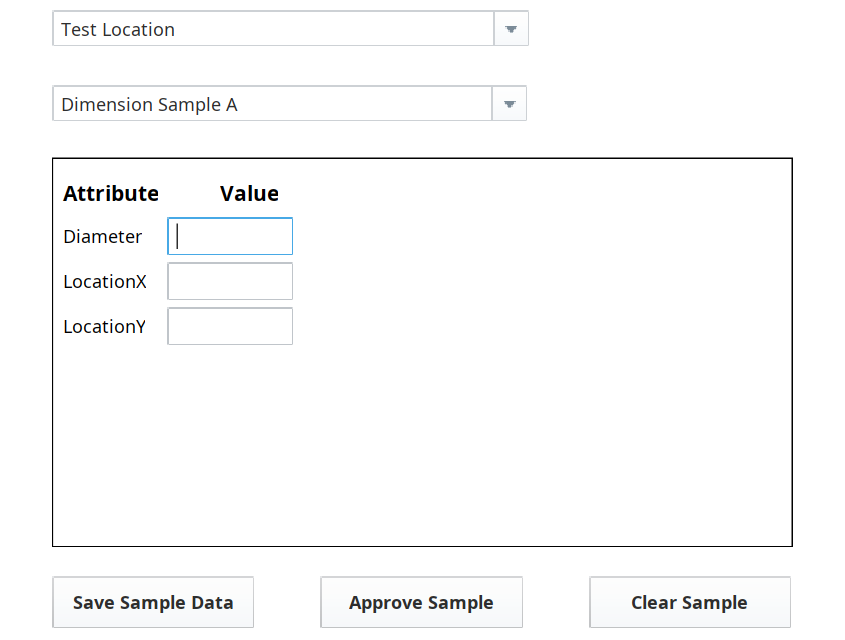
Collect Samples
- Select Test Location in the Location Selector.
- Select the Sample Definition Dimension Sample A in the Definition Selector. The three Sample Attributes will populate in the upper-left corner of the Sample Entry component.
- Collect a sample:
Populate the three data fields with numeric float values between 0 and 100.

Values outside the configured range are flagged with a red dot:

Click Save Sample Data to save the data sample.
- Click Approve Sample to 'approve' the sample.
- Click Clear Sample to clear the Sample Entry component, in preparation for taking another sample (the three data fields will disappear).
- Re-select Dimension Sample A in the Definition Selector drop-down list (the three data fields will re-appear).
- Collect at least 3-5 more samples with different values, to seed the system with some 'visually interesting' and relevant sample data that we will view on a chart on the next screen.
When designing your own real-world sample-collection screens, consider adding work instructions alongside the sample collection interface, to provide manufacturing workers with proper guidance on data types and ranges and expectations regarding their measurements.
Manual data collection is a common use case for SPC applications. Consider use cases in the factory environment that may benefit from structured, consistent manual data collection interfaces like this.