Sepasoft MES Module Suite
MES Document
The MES Document Editor component is used to edit HTML documents for use in the manufacturing environment. It functions as a text editor to create and maintain user-interactive documentation, such as instructions for assembly workers, warning notes and data-entry forms for record keeping. Documents are stored as Artifacts on MES Objects (e.g. Material Definitions, Process Segments).
Visual Editor, HTML Source and Page Preview Modes

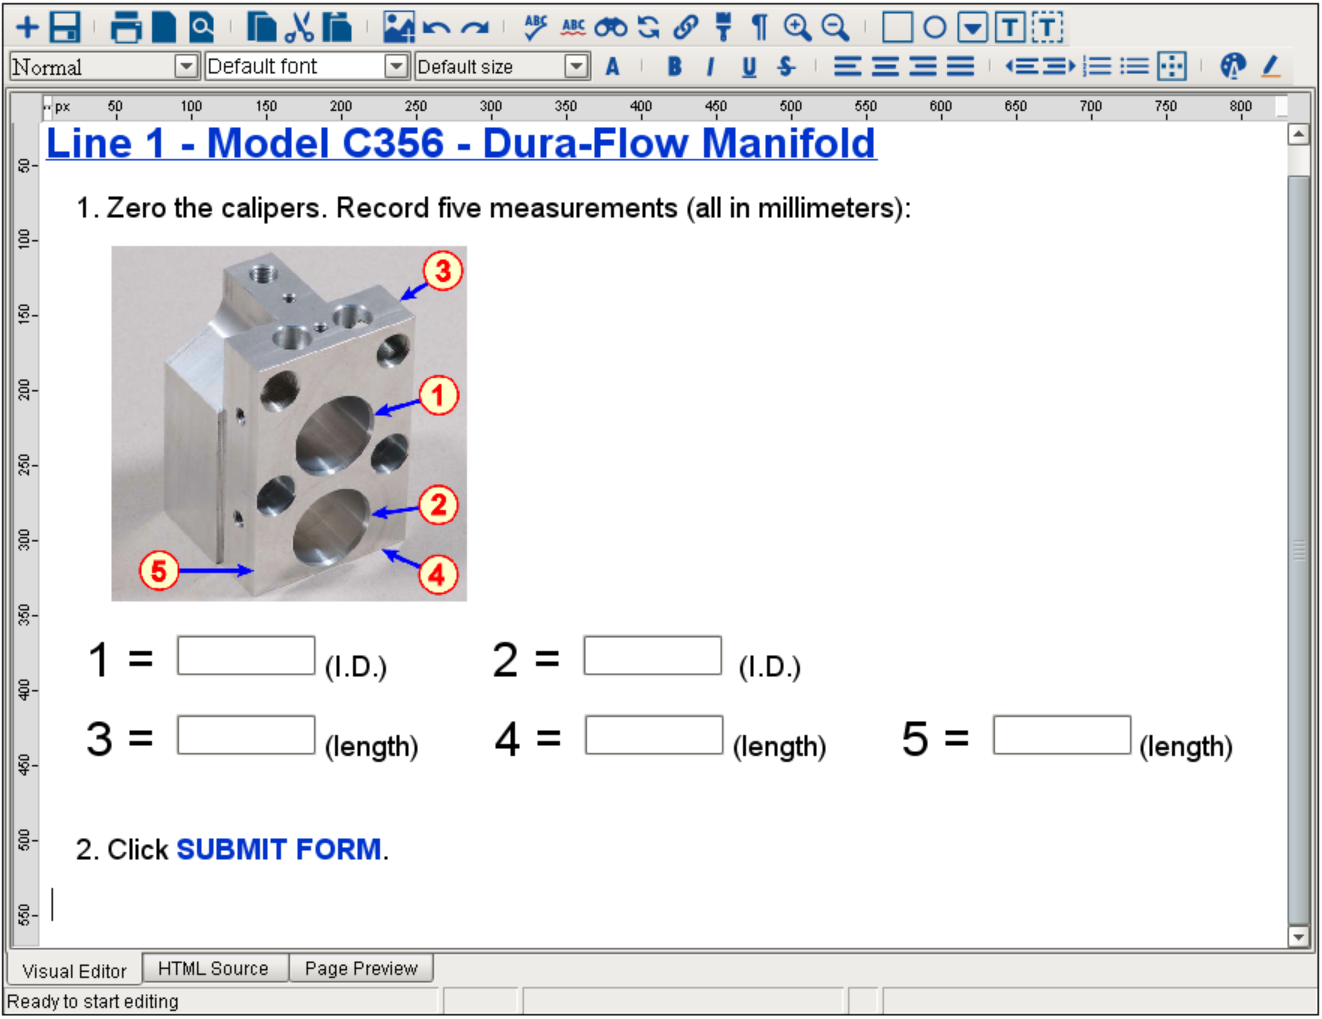
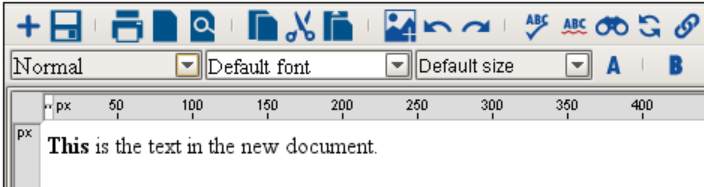
Visual Editor
The Visual Editor tab is editing environment where users can make additions and edits to the contents of the document Artifact, using the functionality in the Toolbar. The HTML source code is continually created and updated as the user adds/edits content. The HTML code is visible and editable in the HTML Source tab (see below).
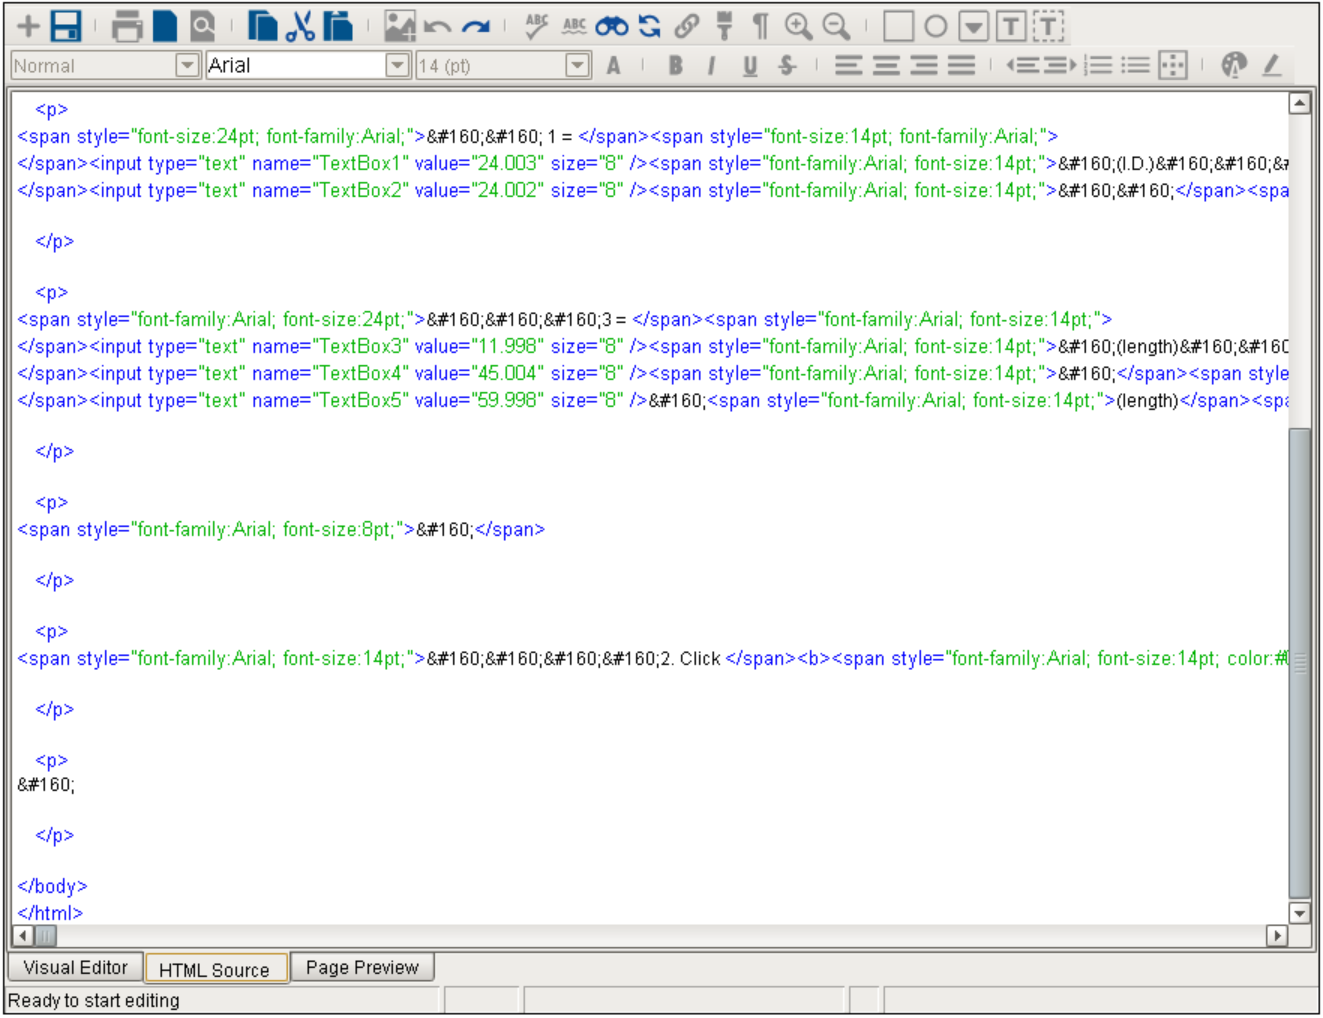
HTML Source
The HTML source code for the document Artifact is continually created and updated as the user adds/edits content in the Visual Editor tab, which is immediately viewable and editable in the HTML Source tab:
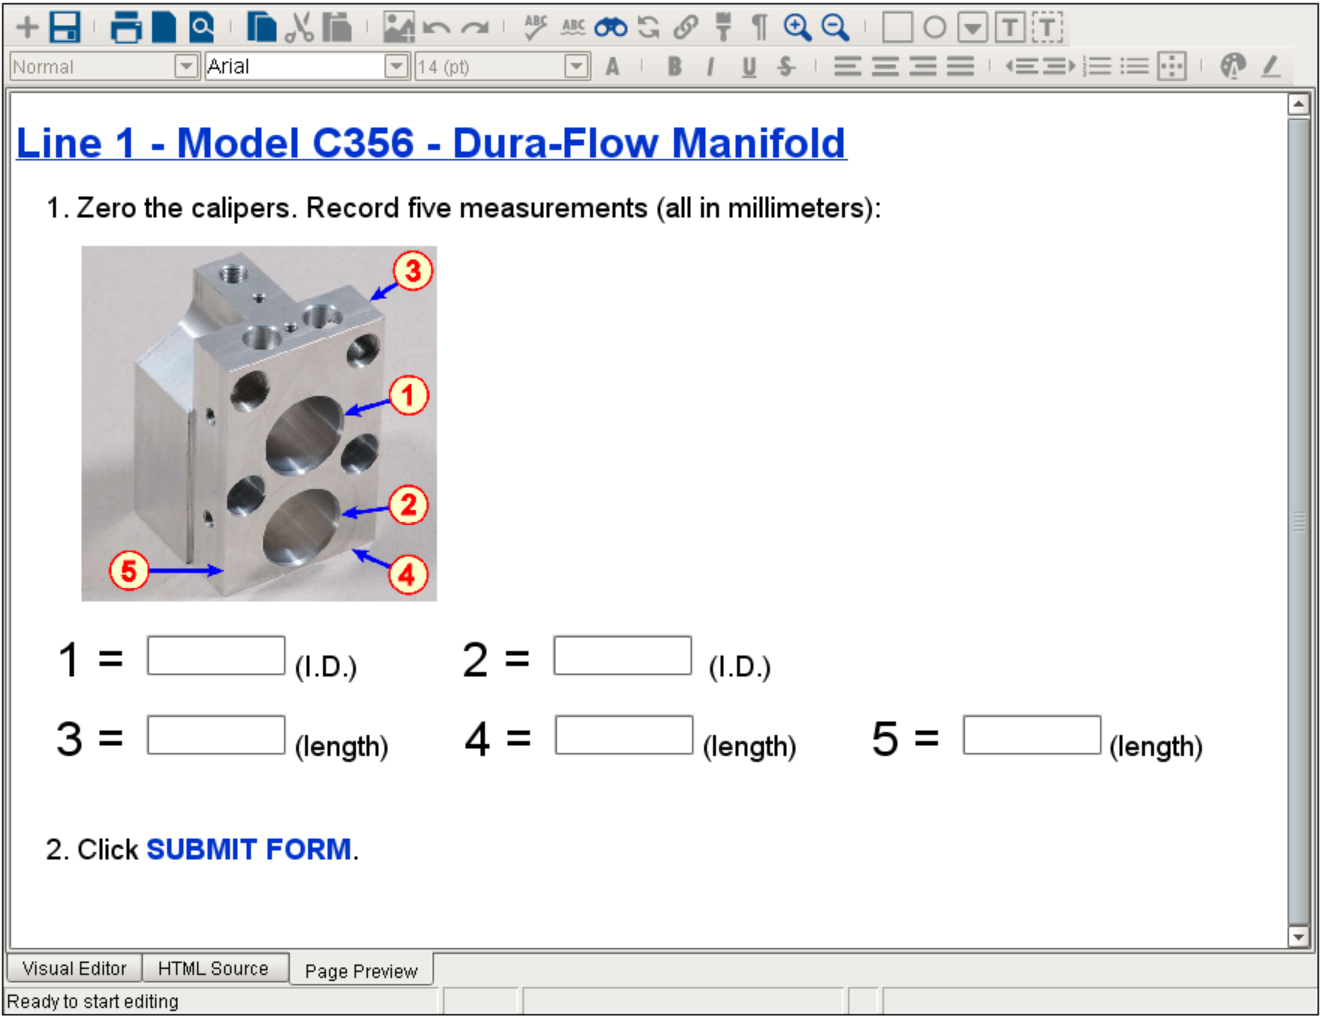
Page Preview
To see how the document Artifact will look when displayed in the MES Document Viewer component, click the Page Preview tab:
Loading a Document
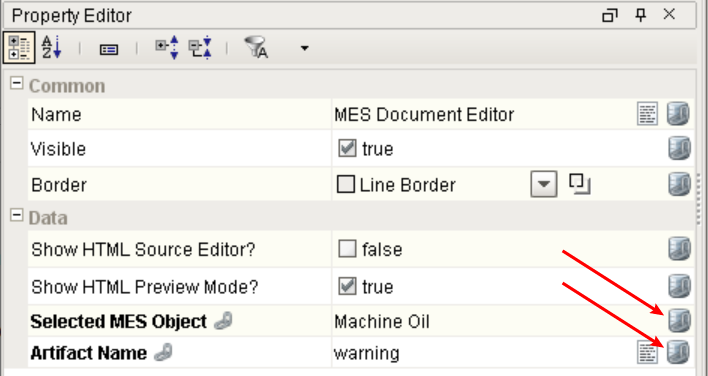
The MES Document Editor component doesn't 'load' a document in the traditional way text editing applications do, using an 'Open' command. Instead, the component uses its Selected MES Object and Artifact Name properties to navigate to an existing Artifact on an MES Object (these properties are typically ties to an MES Object Selector and MES Artifact Selector, respectively). The selected HTML-based document will then appear in the editing window of the component.
Creating a Document
Documents are HTML-format Artifacts, so they can be created by typing or pasting content in the MES Document Editor's text-editing window and clicking Create New Artifact (![]() ), or created separately as Artifacts on MES Objects via scripting.
), or created separately as Artifacts on MES Objects via scripting.
Using Create New Artifact

|
In order to be able to create a new document Artifact on the selected MES Object, the Allow Creation of New Artifacts? property must be set to True, so that the Create New Artifact ( |

- Set the Selected MES Object property of the MES Document Editor with the MESObjectLink of the object to create a new Artifact on.
- Click Create New Artifact (
 ). A pop-up will ask for the name of the new document Artifact to create:
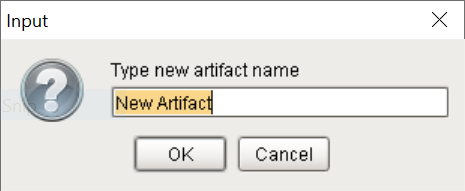
- A new document Artifact will be created on the selected MES Object containing the current contents of the editing window.
Using Scripting
Refer to MES Artifacts for further details on creating Artifacts on MES Objects.
Example: The code below creates a new, versioned Artifact on the Material Definition Machine Oil that contains a string of HTML text. The new document Artifact is shown below in an MES Document Editor editing window.
Script to create a new document Artifact
Code |
|
Importing from an External Document Source
Often existing documentation needs to be imported to MES. Since the MES Document Management module uses documents in HTML with imbedded images, documents need to be saved as xhtml. Here is an example where a document is saved from a word processor application, then imported to MES.
Import Doc and Attach to a Material Definition
Code |
|
Text Editor
The text editor functionality is provided as both 'inline' (e.g. highlight text and use Ctrl-B to bold it) and via a Tool Bar, as show below. The functions in the Tool Bar provide basic document-handling, text-editing and formatting functionality, plus several user-interactive functions that allow factory line operators to enter data, indicate instruction-step completion or decision-making results.

MES Document Editor Tool Bar
Document Handling
These functions provide the ability to save a new document (which creates a new document Artifact on the selected MES Object, or updates an existing Artifact), preview and print the current document, and set up the page layout.
| Icon | Function | Description | ||
|---|---|---|---|---|
| Create New Artifact | Creates a new document Artifact on the selected MES Object containing the current contents of the editing window. The name for the new Artifact will come from the pop-up it provides for the user:
If the name of an existing Artifact on the selected MES Object is entered, an error message will be displayed. Select a unique name.
| ||
| Save File | Saves (and optionally versions) the current contents of the editing window to the currently-selected document Artifact. | ||
| Print File | Prints the document pages. | ||
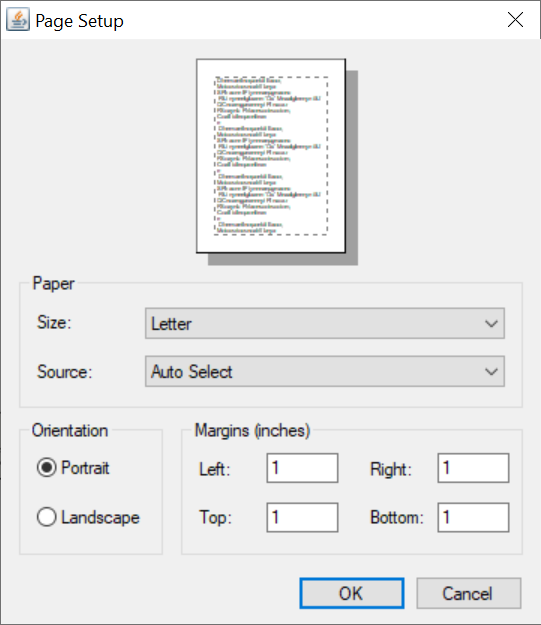
| Page Setup | Configures the document pages for printing.
| ||
| Print Preview | Displays the document pages as it will be printed. | ||
| Copy to Clipboard | Copy the selected text to the clipboard. | ||
| Cut to Clipboard | Clip out the selected text to the clipboard. | ||
| Paste from Clipboard | Paste the selection stored in the clipboard to the cursor position in the editing window. | ||
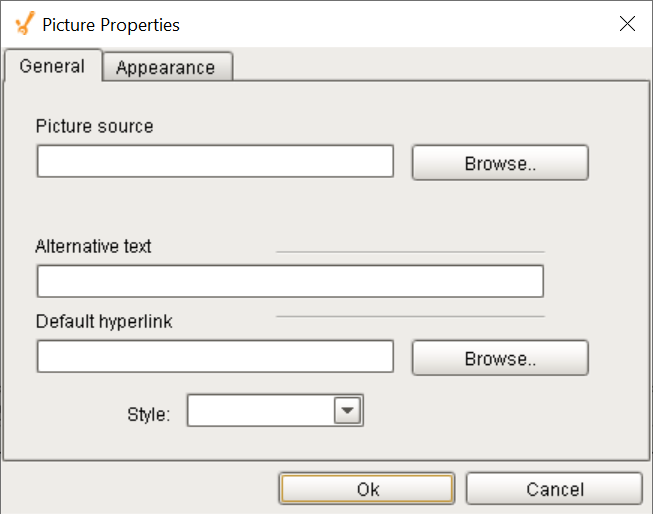
| Insert Image | Insert an image into the text, either from a URL located on the internet or from a file on your local machine or network.
| ||
| Undo | Undo: Undo the last action carried out by the user. For each successive press of the undo button a preceding user action will be undone. | ||
| Redo | Redo: Redo the last action carried out by the user. For each successive press of the redo button a preceding user action will be carried out again. | ||
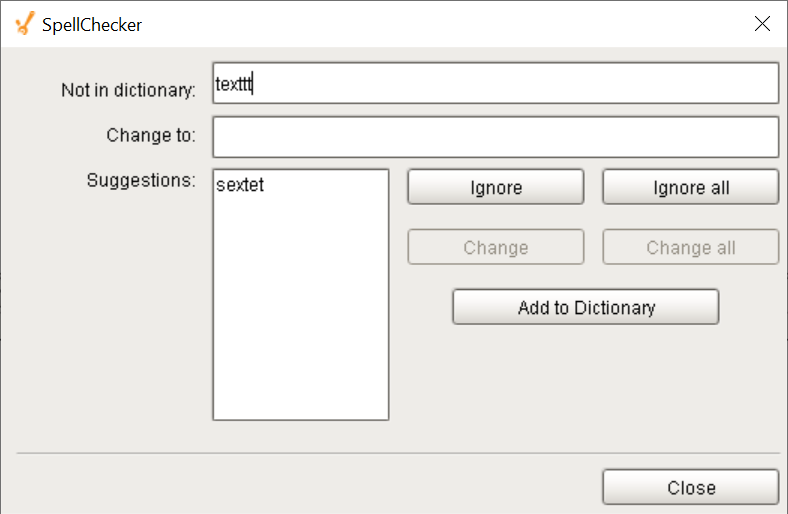
| Spellchecker | Starts spellchecking the document from the beginning, prompting the user for a correction at each instance found.
| ||
| As-You-Type Spellchecker | Spellchecks inline as the user types. Provides red wavy underlining at each instance found. Right-clicking on the instance provides alternative word suggestions, as well as the ability to add/remove the word to/from a local dictionary. 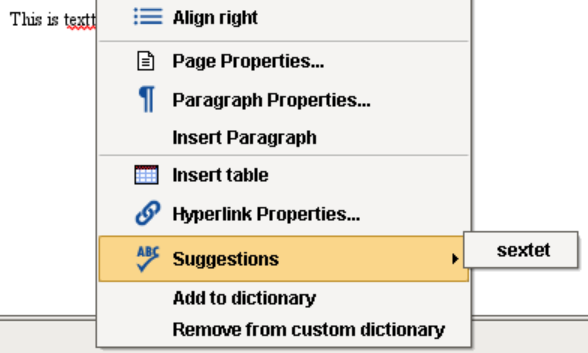 | ||
| Find | Finds each instance of the string entered in the Find what field, starting from the current cursor position in the document. Options are available to search upwards or downwards in the document, as well as using specific search criteria.
If Highlight search is selected, then every instance of the string entered will become highlighted (unselect the Highlight search box to remove the highlighting):
| ||
| Replace | Replace a string found in the document with another, starting from the current cursor position in the document. Options are available to find-and-replace upwards or downwards in the document, as well as using specific find-and-replace criteria.
| ||
| Insert Hyperlink | Insert a hyperlink in the text to a link that is accessible on the Internet. | ||
| Copy Formatting | Copies all the formatting in the selected area in order to apply it to another area in the editing window. | ||
| Show Paragraphs | Shows the paragraph objects. | ||
| Zoom In | Increases the viewing size of the text without changing the formatting. | ||
| Zoom Out | Decreases the viewing size of the text without changing the formatting. | ||
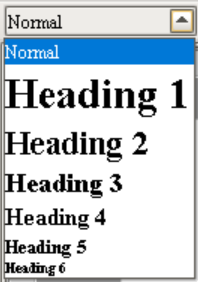
| Font Style | Select the font style for the currently-selected text.
| ||
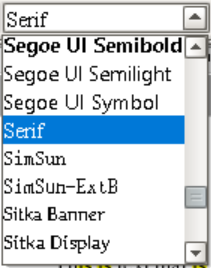
| Font | Select the font for the currently-selected text.
| ||
| Font Size | Select the font size for the currently-selected text.
| ||
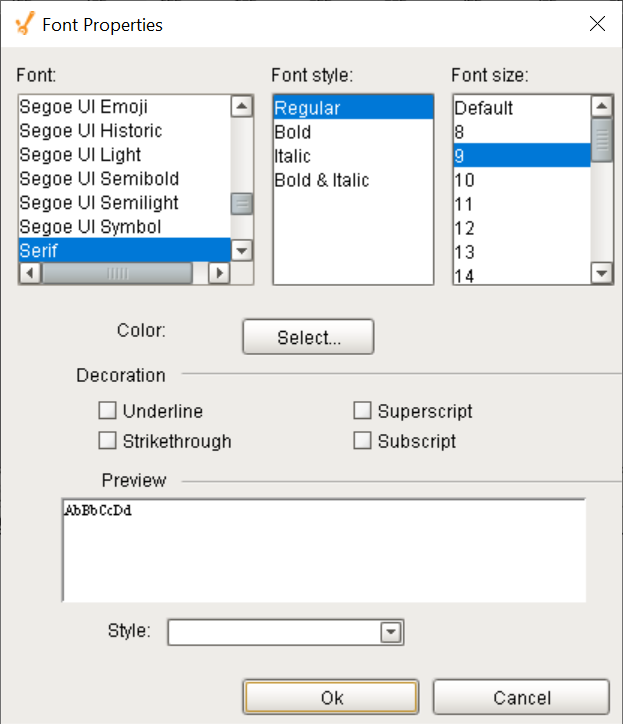
| Font Properties | Select the font properties for the currently-selected text.
| ||
| Bold | Bold the currently-selected text. | ||
| Italic | Italicize the currently-selected text. | ||
| Underline | Underline the currently-selected text. | ||
| Strikethrough |
| ||
| Align Left | Left-align the currently-selected text. | ||
| Align Center | Center-align the currently-selected text. | ||
| Align Right | Right-align the currently-selected text. | ||
| Align Justified | Justify the currently-selected text. | ||
| Increase Indent | Moves the indentation of the current line one tabulator to the right. | ||
| Decrease Indent | Moves the indentation of the current line one tabulator to the left. | ||
| Numbered List | Makes the currently-selected lines into a numbered list. | ||
| Bulleted List | Makes the currently-selected lines into a bulleted list. | ||
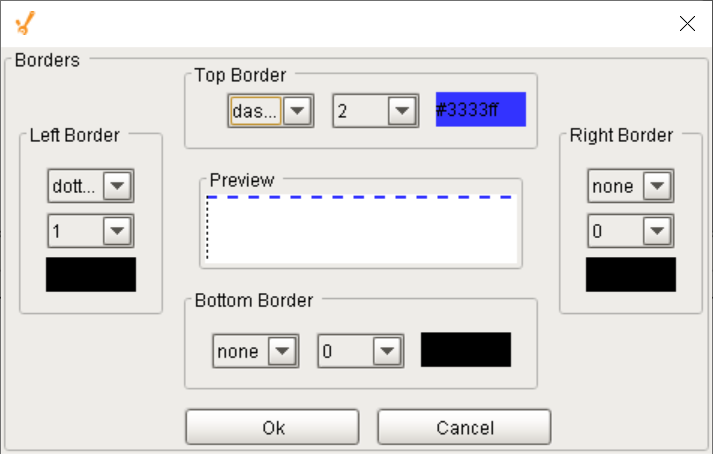
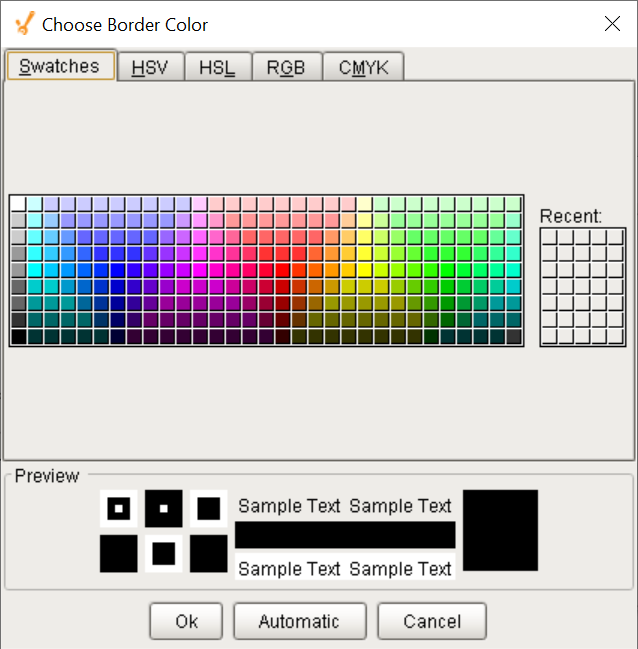
| Borders | Adds a border around the line at the current position. If more than one line is selected, then the border is applied to each line separately. Customizations for each side of the border:
Clicking on any color swatch opens the Choose Border Color dialog box:
| ||
| Foreground | Changes the foreground color. Click to open the Choose Foreground Color dialog box:
| ||
| Highlight Color | Changes the background color. Click to open the Choose Background Color dialog box:
| ||
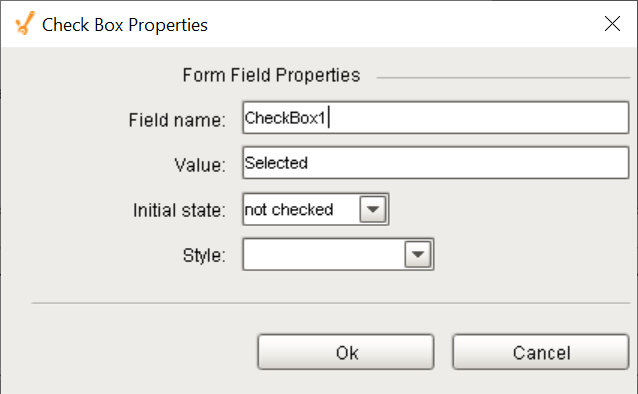
| Checkbox | Inserts a Checkbox at the current position. Any number of Checkboxes may be selected (checked) at the same time in a document. Right-click on any Checkbox and select Form Field Properties to set its properties:
| ||
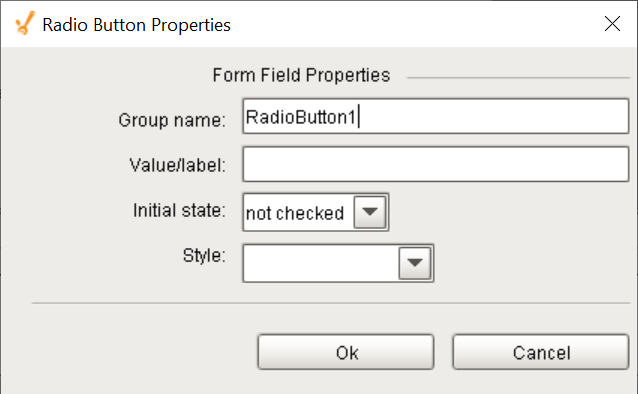
| Radio Button | Inserts a Radio Button at the current position. Any number of Radio Buttons may be selected at the same time in a document by default, but they can be 'grouped' (assigned the same group name) in the Radio Button Properties dialog box (see below) and then only one radio button in that group can be selected at a time (clicking another Radio Button in the group deselects the previous selection). Right-click on any Radio Button and select Form Field Properties to set its properties:
| ||
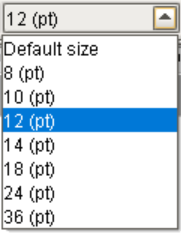
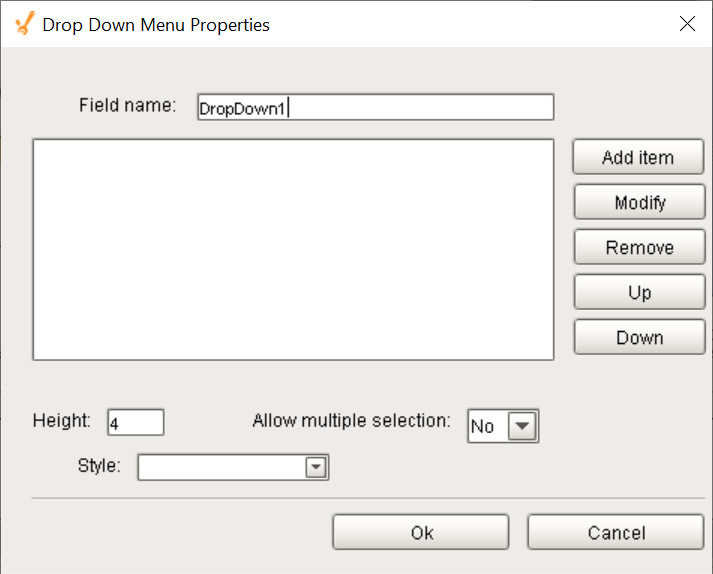
| Drop-down Menu | Inserts a Drop-down Menu at the current position. Right-click on any Drop-down Menu and select Form Field Properties to set its properties:
Items can be added by clicking the Add Item button. The Height property can be set to force the box to remain fixed in height at the number of lines specified. The order of the entries can be modified by selecting an item and clicking Up or Down to move it in relation to the other entries. | ||
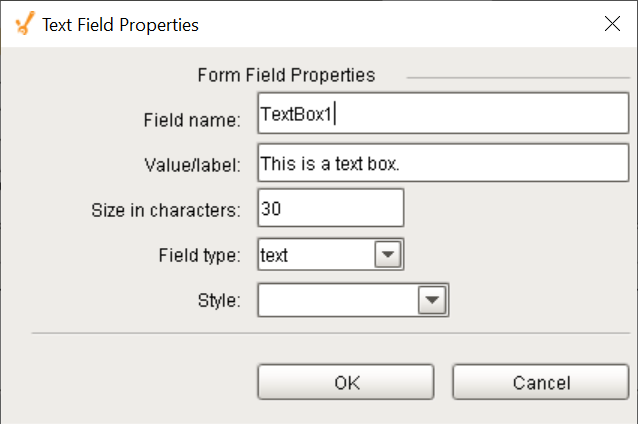
| Text Box | Inserts a one-line Text Box at the current position.
Right-click on any Text Box and select Form Field Properties to set its properties:
The Size in Characters property can be set to force the box to remain fixed in width to the number of characters specified. If the Field Type property is set to password, then all characters entered will be displayed as asterisks:
| ||
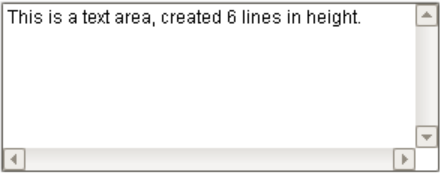
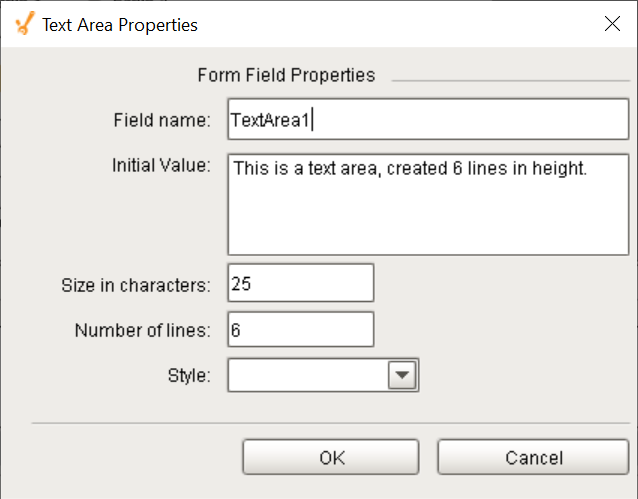
| Text Area | Inserts a multi-line Text Area at the current position.
Right-click on any Text Area and select Form Field Properties to set its properties:
The Number of Lines property can be set to force the box to remain fixed in height at the number of lines specified. The Size in Characters property can be set to force the box to remain fixed in width to the number of characters specified. An initial text value can be populated into the Initial Value property, to act as a prompt to the user about how to enter data. |


Sepasoft MES Module Suite