Authoring a Simple Recipe and Executing a Batch
Author Recipe
This simple kitchen-timer recipe includes the basics in setting a recipe, defining parameters and referencing parameter values.
Follow these steps:
- Author Recipe
- Recipe-level Parameters
- Author the Recipe
- Referencing Parameters in Transitions
- Viewing Batches
- Batch Controller vs. Batch Monitor
- Electronic Batch Record - EBR Viewer
Author the Kitchen Timer Recipe
Before completing these steps, you need to build out the equipment and group unit functionality. You can do this in the UI or scripting.
Do this in Scripting:
- Scripting the Production Equipment Model for Batch
- Creating and Configuring the Recipe Framework in Script
Now begin to author the recipe.
The timer executes based on the seconds set in a parameter and then a Boolean parameter set to True by an operator before the recipe ends.
- Navigate to Recipe Editor.
- In the header on the right, click the Plus icon > Create Recipe Class. Name it Training. This is simply a folder for organization.
- Click the Training recipe class, and click the Plus icon > Create Recipe.
- Name it: aRecipe.
Recipe-level Parameters
The recipe definition information displays first when you create a recipe. After saving the recipe, you can access this information by clicking the Gear icon in Edit Recipe page. This is where recipe-level parameters are managed.
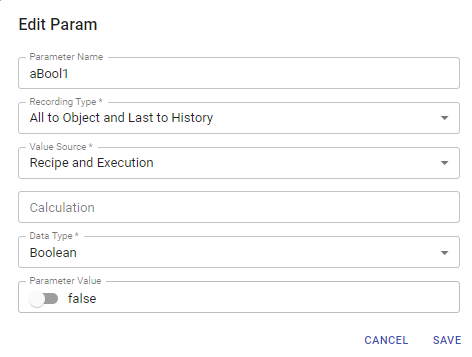
- Under Parameters, click the Plus icon. Add a parameter named aBool1. Set the parameter props as shown in the screenshot. The definitions are given below. This one will be used to set the transition gate to True during execution.
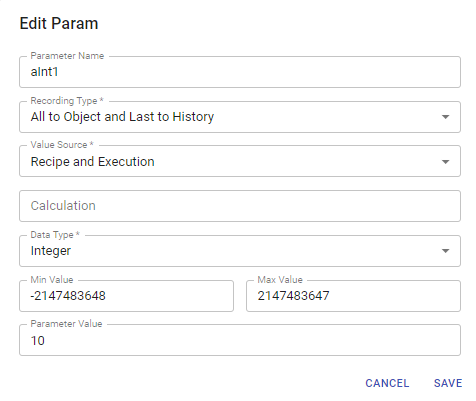
- Add another parameter named aInt1. This one will be used to set the timer duration in the recipe.
Property Settings to remember:
Recording Type: Required
This defines when and if values are saved to the database. Saving to history provides values for analysis. Saving to object ensures the continuity of operation.
For each type's purpose and data storage method, see Recording Type in Phase Parameter Properties.
Value Source: Required
Sets when and where parameter values come from. Recipe gets the value before the batch goes into state running state. Recipe and Execution get values before and during execution.
For a definition of each of the options: 'recipe', 'execution', 'recipe and execution', 'monitor', and 'synchronization manager', see Value Source in Phase Parameter Properties.
Calculation:
- Click the checkmark icon in the upper right to save the work done here.
Author the Recipe
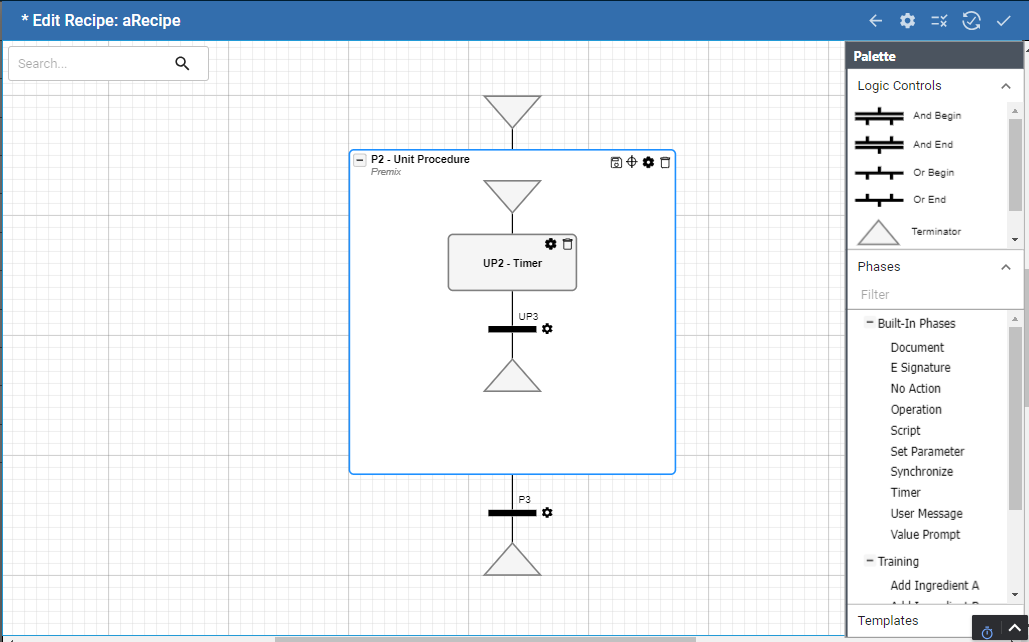
The Start logic control is given to you in the design space. Now you will add other logic controls to build the recipe.
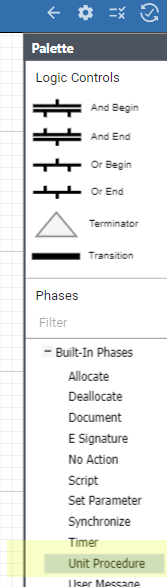
- Under Palette, go to Phases > Built-In Phases and drag and drop a Unit Procedure to the design space.
- Drag a Transition under the Unit Procedure.
- Then, drag a Terminator under the Transition. Drag-hold-release to connect them up.
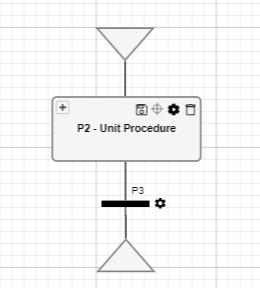
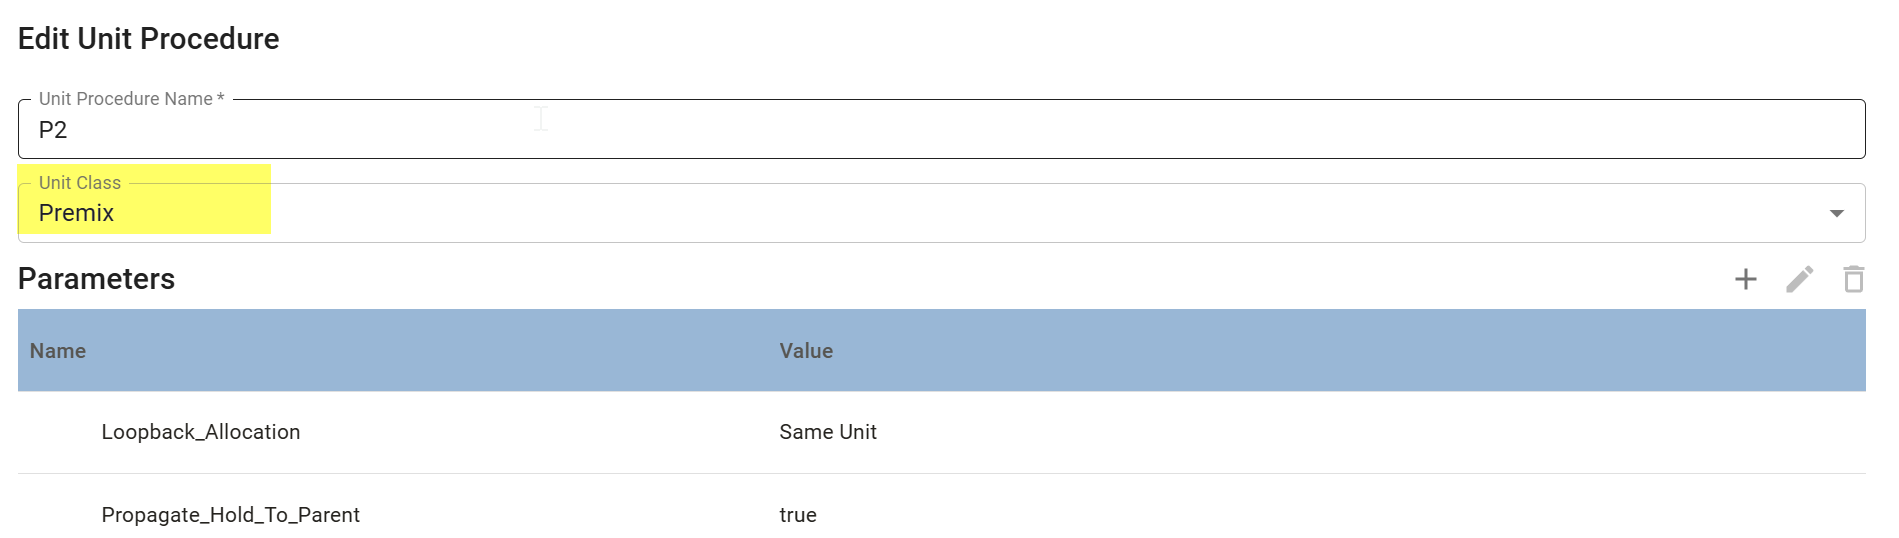
- On the Unit Procedure, click the Gear icon and for Unit Class, select Premix.
- Open the Unit Procedure by clicking the plus icon at the top.
- Under Built-In Phases, add a Timer phase.
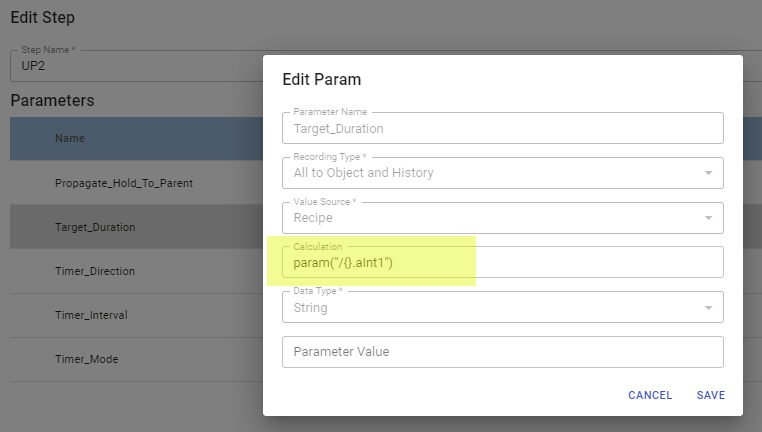
- Click the Gear icon to open the Timer's parameters. Select the Target_Duration parameter to reference the integer recipe parameter.
- Enter: param("/{}.aInt1")
- Add a Transition and a Terminator.

Referencing Parameters in Transitions
Transition gates prohibit execution based on the transition expression. Intellisense finds logical syntax based on the sequence of the recipe.
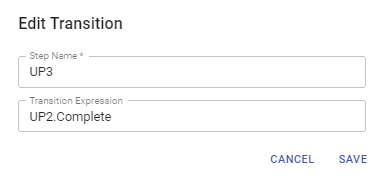
- Under the Timer phase, click the Gear icon
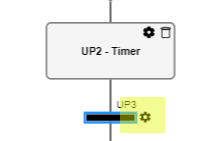
- Save UP2.Complete. This means that the previous step must be complete before this transition gate is released.
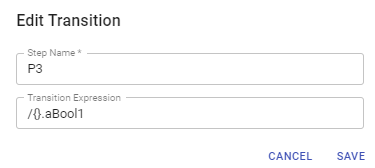
- Select the Transition after the Unit Procedure.
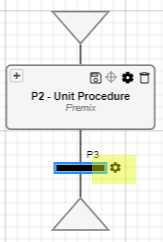
- Add the transition expression: /{}.aBool1
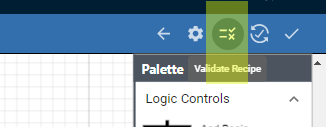
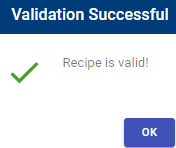
- Ready to validate recipe. In the top right, click the Validate icon. If you have errors, the messages will help you trouble shoot. Validate until the Validation Successful message.
Batch Execution and Monitoring
- In the left-side navigation, click Batch Execution. In the upper right, click the Plus icon to open New Batch.
- In the Recipe field, select the recipe you just created: aRecipe

Notice the two recipe-level parameters in the view. One of which is referenced in the Timer phase duration parameter and the other named aint1 is referenced in the Transition under the Unit Procedure.
- In the BatchID field, enter something, like a1.
- Click the checkmark to save the batch.
Now the batch is sitting idle in the batch queue.
- Click the checkmark in the batch list, and click the command-panel icon > select the Start icon.

Viewing Batches
There are two main components where you can view a batch during execution: Batch Monitor and Batch Controller.
Batch Controller vs. Batch Monitor
- From the left navigation, open Batch Monitor. In Batch ID, select the batch that was just executed. Notice that the Target_Duration was set by the recipe aint1 value.
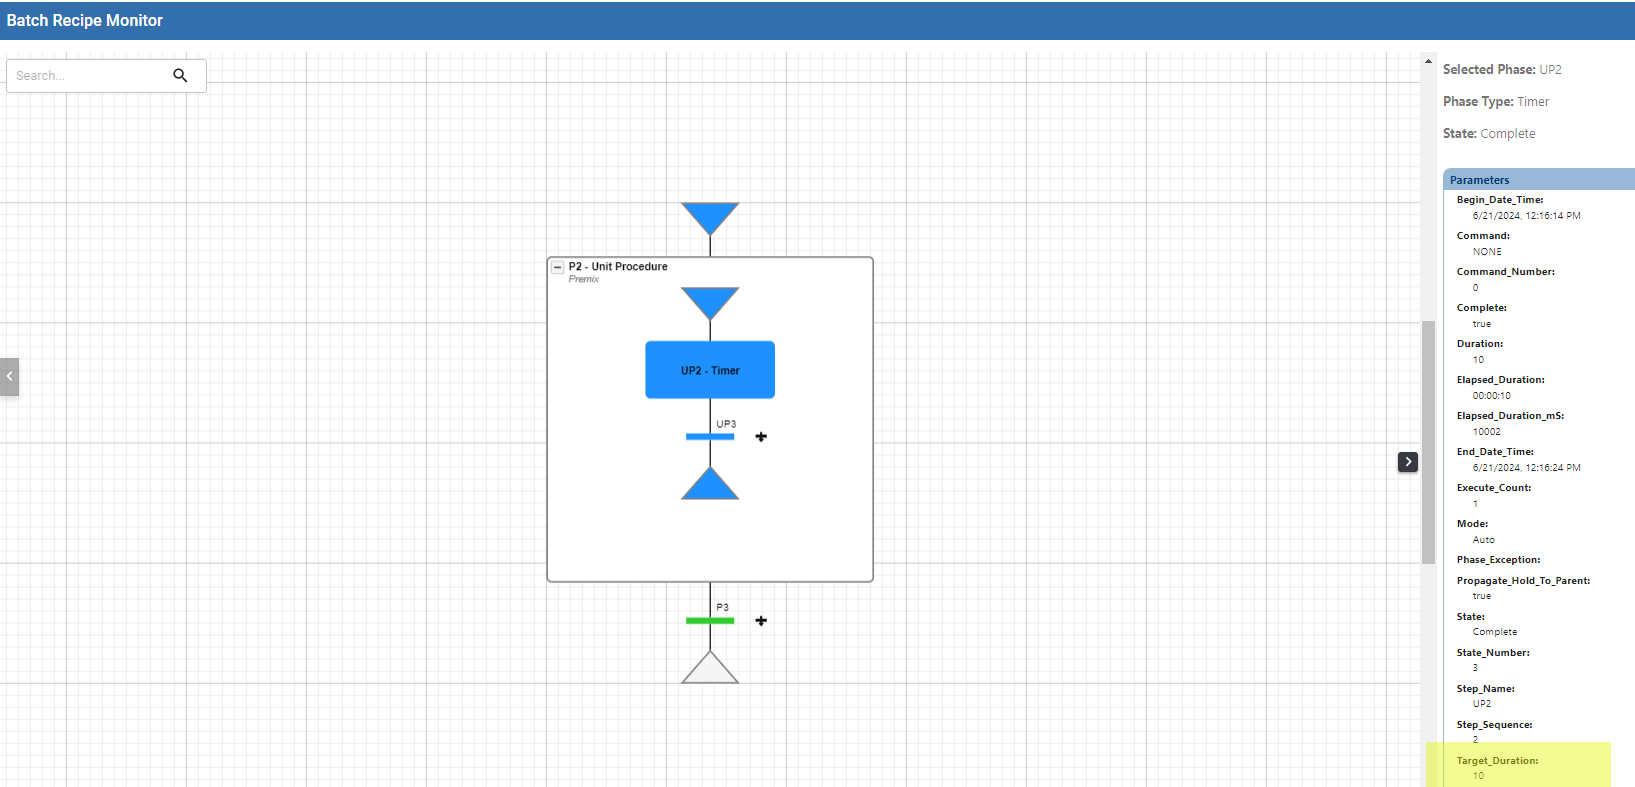
- Notice the Transition under the Unit Procedure is not blue. Blue means that execution is complete. Green means it's been evaluated.
- In the navigation, click Batch Controller. Here, you can access the aBool1 parameter and set the value to True, which will allow that transition gate to complete the batch.
- In the BatchID field, select the batch. In the parameter list, click the edit icon for the aBool1 parameter.
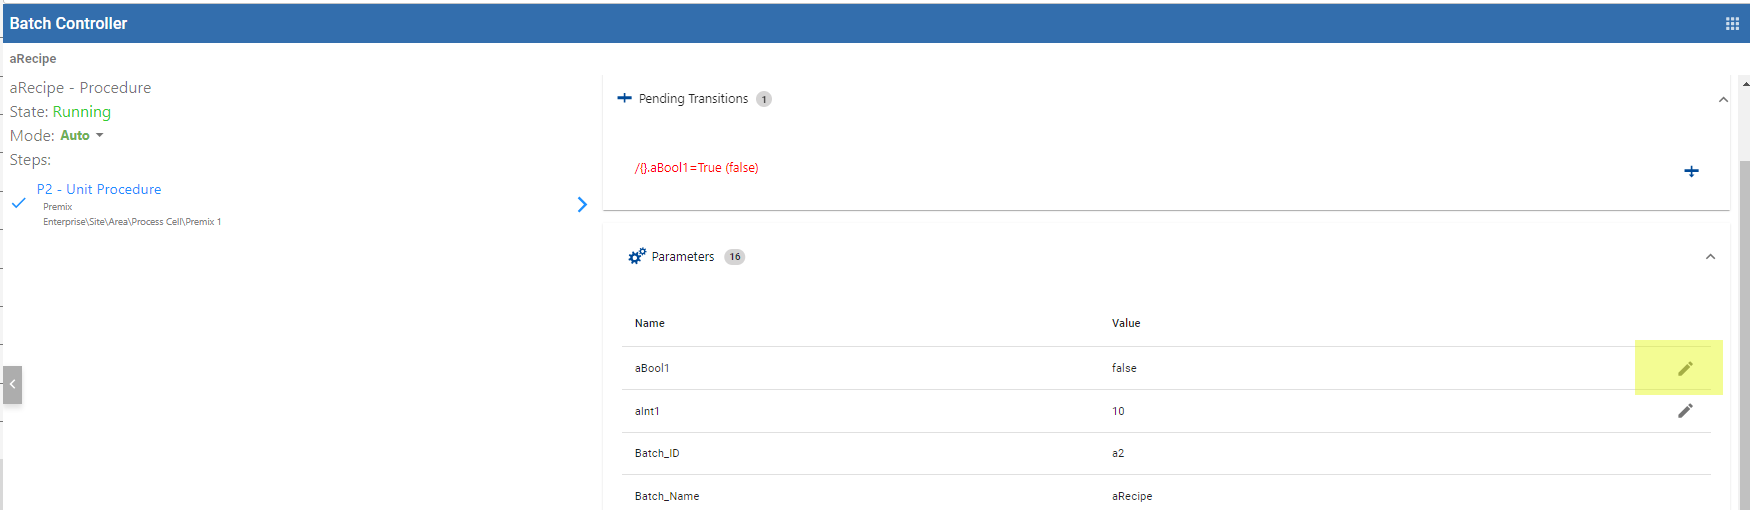
- Set the parameter value to True.
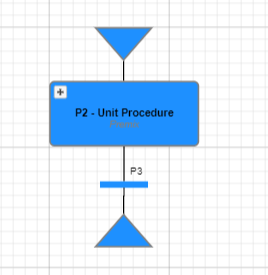
- Open Batch Monitor and notice now the batch has completed.
Electronic Batch Record - EBR Viewer
You can use EBR Viewer for viewing batch history, including customization options for different audiences and the ability to export data.
- In the navigation, select EBR Viewer and select the batch in BatchID.

Reference Documentation: