Sepasoft MES Module Suite
SPC Sample Entry Component
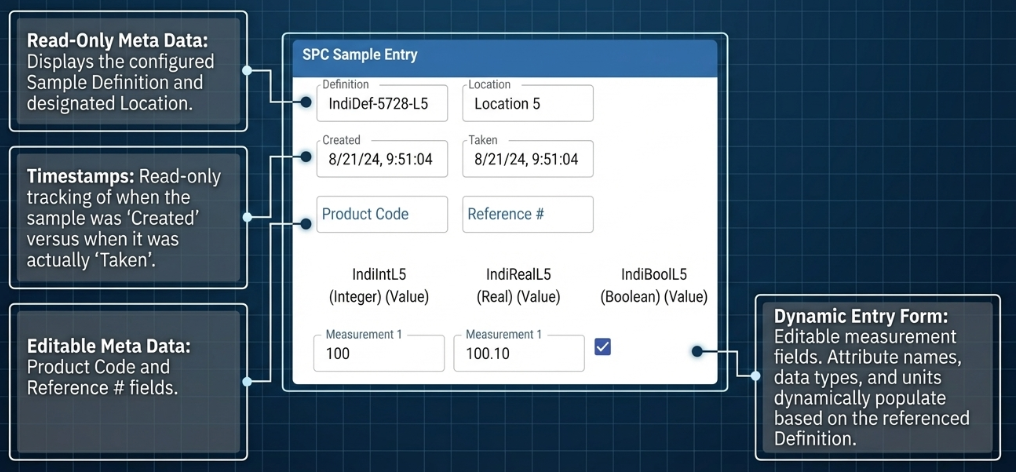
The SPC Sample Entry component is designed for managing and reviewing sample measurement data. The entry fields are dynamically created based on attributes defined in the Sample Definition.
This component functions by utilizing a Sample UUID to dynamically generate input fields based on predefined attribute configurations in a Sample Definition.
In Ignition Designer:
Samples can be integrated into the component through automated scheduling, manual scripting, or selection from a filtered list. The interface includes a customizable toolbar for tasks such as validating measurements against control limits, saving notes, and discarding unsaved changes.
Additionally, developers can adjust various component properties to control the layout, data validation rules, and visibility of specific UI elements.
See below:
- How to Use the Sample Entry Component
- Accessing the Perspective SPC Sample Entry Component
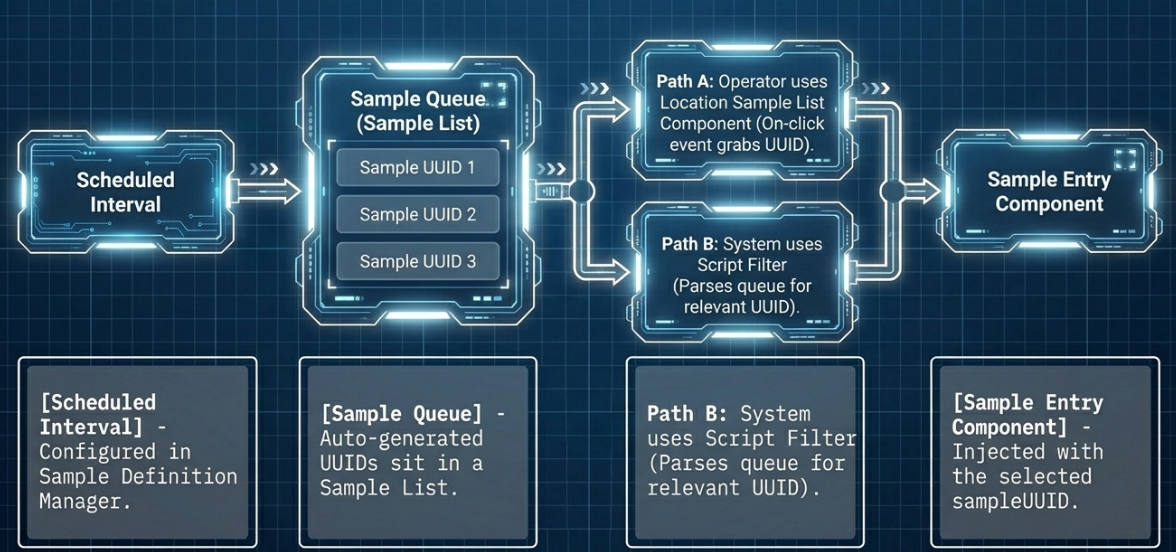
- Scheduled Entry and Passing Data to the Sample Entry Component
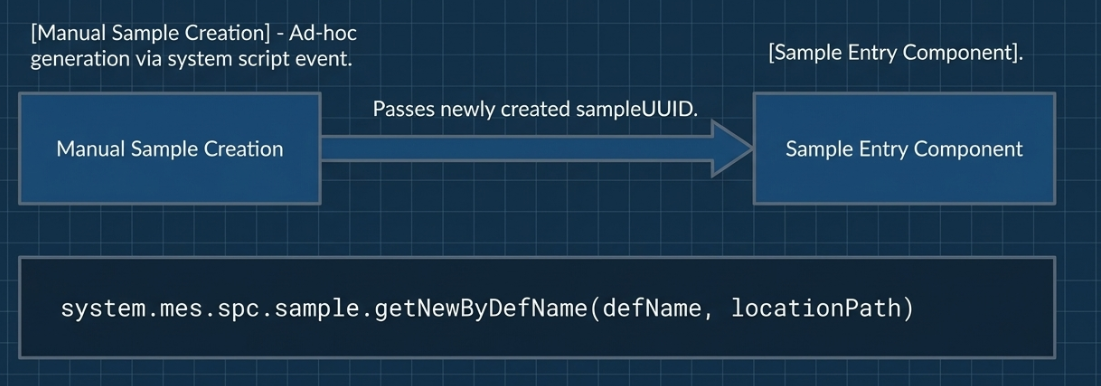
- Manual Entry
- Integrating the Location Sample List with Sample Entry
- SPC Sample Entry UI Description
- Component Properties
How to Use the Sample Entry Component
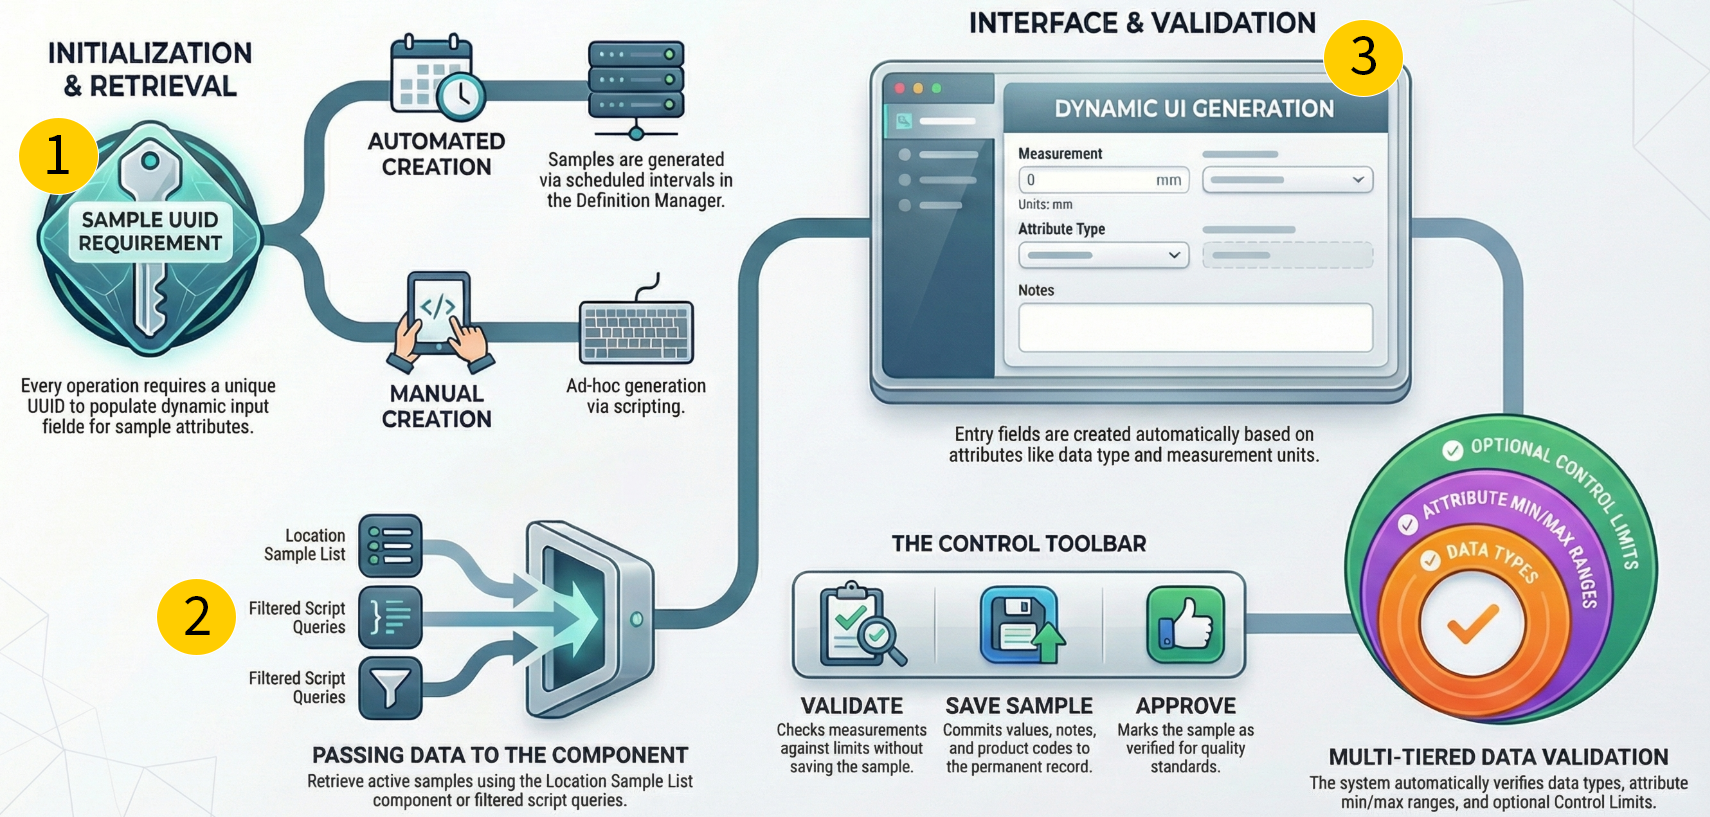
 | Initialization and Retrieval | Creating New Samples to Retrieve If you need to generate a new sample to retrieve its UUID, you can do so in two ways:
|
 | Passing Data to the Component | Retrieving Existing Samples If a sample has already been generated, you can retrieve it by filtering a list of samples using one of two methods:
|
 | Interface and Validation | Interface: the entry fields in the SPC Sample Entry component are dynamically created based on the attributes defined in the Sample Definition. When you pass a specific Validation: Sample measurements in the SPC Sample Entry component are validated against three specific criteria:
|
Accessing the Perspective SPC Sample Entry Component
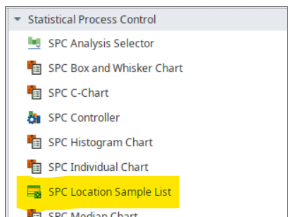
The SPC Sample Entry component is installed with the SPC module. Access the component from the Perspective Component palette in Designer.

|
The SPC module must be installed to access these components. |

Scheduled Entry and Passing Data to the Sample Entry Component
Manual Entry
Interface of the Sample Entry Component
Integrating the Location Sample List with Sample Entry
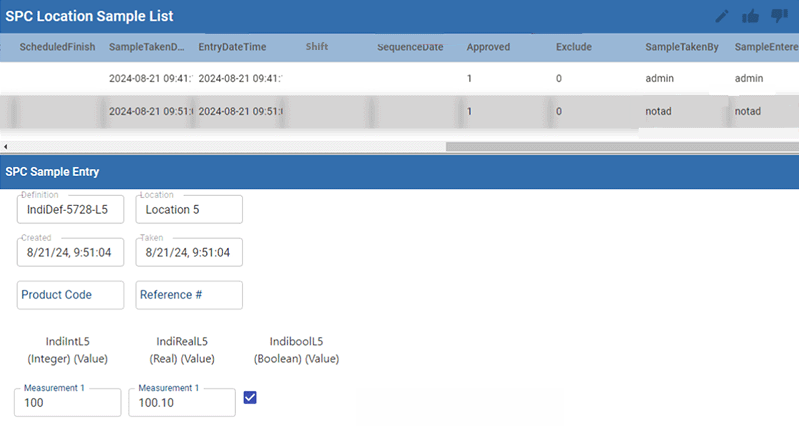
You can use the SPC Location Sample List component to retrieve a list of generated samples based on specific filter criteria. By configuring an on-click event on this list, you can capture the unique Sample UUID of a selected sample. That UUID is then pushed directly to the SPC Sample Entry component, which automatically populates its UI with the selected sample's data so you can add measurements, modify details, or approve it.
SPC Sample Entry UI Description
| Component UI | Description |
|---|---|
 | |
| Toolbar (based on component properties) |
When you click the Validate Measurements icon, the system performs error checks on your entered data against three criteria: data types, attribute min/max values, and Control Limits. Crucially, using this tool does not save the sample. It is strictly used to test your inputs. Consistent with the saving process, the validation against Control Limits is conditional; the system will only flag Control Limit errors if this component's allowOutsideProperties (or allowOutsideLimits) property is set to False. If there are any violations, an error dialog box will pop up detailing which specific measurements violated the limits, allowing you to review them before attempting to save
 Discard Changes: Resets the sample values and meta data, such as notes, to their values when the sample was last saved Discard Changes: Resets the sample values and meta data, such as notes, to their values when the sample was last saved
Errors or success message will be shown in a dialog box. |
| Definition field | Read-only field for the Sample Definition name tied to the sample(s). |
| Location field | Read-only field for the Location where the sample is taken. |
| Created field | Read-only field for the Date/Time when the sample was created |
| Taken field | Read-only timestamp of when the sample was taken. |
| Product Code field | Editable field |
| Reference # field | Editable field |
 Edit Note/Cause: Opens a dialog box where you can add or edit a note. The note can be any text string, and usually explains a cause if a sample is outside of production standards.
  Approve/Unapprove Sample: Select a sample in the list and click Approve or Unapprove.
 Validate Measurements:
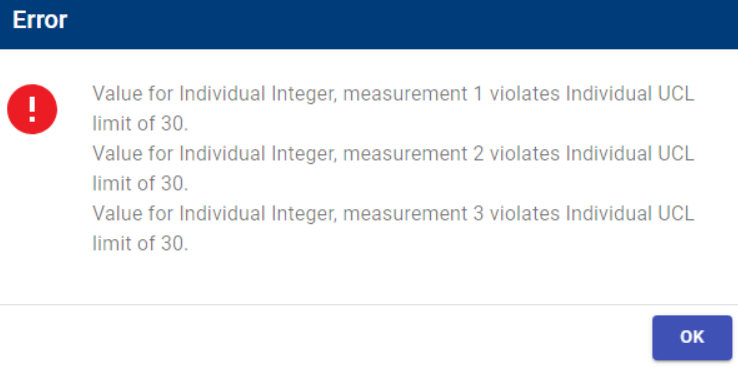
 Save Samples: Saves any changes made to measurement values, Note/Cause, or Product Code/Reference No. Any errors display if any exist. Will only check for errors against Control Limits if the "allowOutsideProperties" is false. Otherwise, it will save even with values outside Control Limits (not to be confused with Attribute Min/Max values, which are always checked).
Component Properties
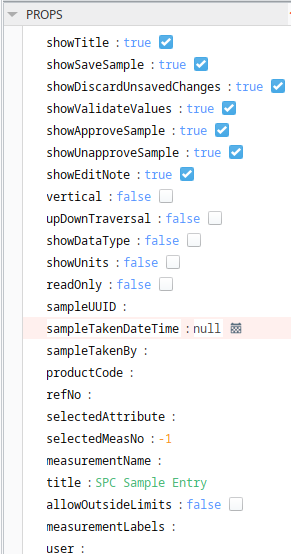
| Property | Description |
|---|---|
| showTitle | Boolean - When set to True, displays the Title header. Default is True. |
| showSaveSample | Boolean -When set to True, the Save icon displays in the component. See Toolbar descriptions above. |
| showDiscardUnsavedChanges | Boolean -When set to True, the DiscardChanges icon displays in the component. See Toolbar descriptions above. |
| showValidateValues | Boolean - When set to True, the Validate icon displays in the component. See Toolbar descriptions above |
| showApproveSample | Boolean - When set to True, the Approve icon displays in the component. See Toolbar descriptions above |
| showUnapproveSample | Boolean -When set to True, the UnApprove icon displays in the component. See Toolbar descriptions above |
| showEditNote | Boolean - When set to True, the Note/Cause icon displays in the component. See Toolbar descriptions above |
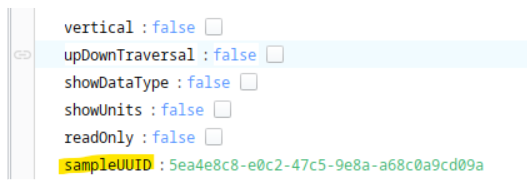
| vertical | Boolean - When set to False, the Attribute names display on the left, with measurements moving out to the right. When set to True, the Attribute names display along the top, with measurements moving down. Default is set to False. |
| upDownTraversal | Boolean - When set to False, the tab order through measurements moves left to right (then wrap around top to bottom), regardless of vertical setting. When set to True, that tab order through measurements moves top to bottom (then wrap around left to right), regardless of vertical setting. |
| showDataType | Boolean - Displays the data type of the attribute. |
| showUnits | Boolean - Shows the unit values for each attribute. |
| readOnly | Boolean - Prevents the editing of sample values. |
| sampleUUID | String - UUID of the sample to edit. |
| sampleTakenDateTime | Date/Time -Date and time when the sample was taken. |
| sampleTakenBy | String - Name of the user taking the sample. |
| productCode | String - Product number/code of the sample. The system does not use this product code for functionality. You can use it in analysis to filter for samples. |
| refNo | String - Reference number of the sample. Product number/code of the sample. The system does not use this product code for functionality. You can use it in analysis to filter for samples. |
| selectedAttribute | String - The selected attribute in the entry form. |
| selectedMeasNo | String - The selected attribute measurement number. |
| measurementName | String - The text to display for the selected measurement name in the upper left. |
| title | String - Title of the component. Use this property to change the title in the browser. |
| allowOutsideLimits | Boolean - When set to True, measurements can be added that are outside the limits. When set to False, the system will flag Control Limit errors. |
| measurementLabels | String - a comma-delimited list of titles to use for measurements. Defaults to 1, 2, 3... |
| user | The user property can be used in saving sample measurements in lieu of a user session. Add any string into the input field to populate the `user` property. |
Sepasoft MES Module Suite