Sepasoft MES Module Suite
Setting Up for Traceability Quick Start
This short how-to demonstrates the minimum configuration using the UI required for tracing materials through Batch Procedure.
- Basic setup
- Material_In and Material_Out Resource parameters and their sub-parameters
- How tracing works during execution
Required Views
You can use this Starter Project:
Core MES Components:
-
-
- Material Manager
- Equipment Manager
-
Track & Trace Components:
-
-
- Trace Graph
- Lot selector
-
Batch Components:
-
-
- Phase Manager
- Recipe Editor
- Batch Monitor
-
Configuration
Production Equipment
-
- Equipment Model, Process Cell and equipment Units
- Setting sub-parameters for specific functionality
Materials
-
- Materials defined in Material Manager ( Vision component or Perspective OEE Material Manager. Note the starter project linked here uses the Vision component in Ignition Designer.)

|
Minimum modules needed for this tutorial:
Import this starter project that contains the required views to complete this tutorial: Starter Project with Trace Graph If you are unfamiliar with Batch Procedure, see: |
Setting Up Material, Phase Configuration and Authoring the Recipe
|
Overview |
|
|---|---|
| Step 1: Resource Materials |
In step 1 below, you will set up the input and output materials.
|
| Step 2: Phase Configuration |
Here, you'll add an equipment phase with both the Material_In and Material_Out resource parameters.
|
|
Step 3: Recipe Authoring |
In this step, build a recipe.
Run a batch. View the batch in the Trace Graph.
|
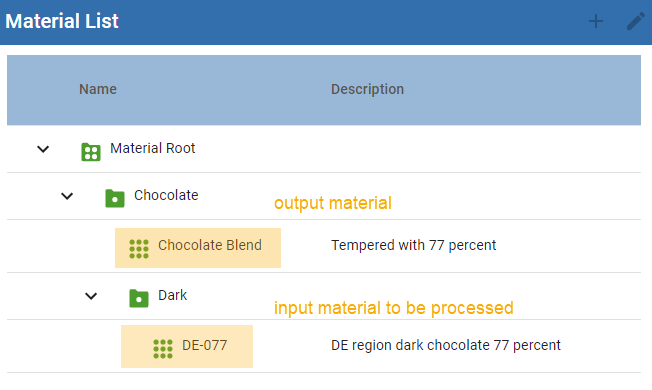
Step 1: Adding Materials
- In Material Manager, add 1 material for Material In. Then add 1 material for Material Out.
No further configuration of materials is needed for this tutorial.
Step 2: Add Material Parameters to an Equipment Phase
Add material resource parameters.
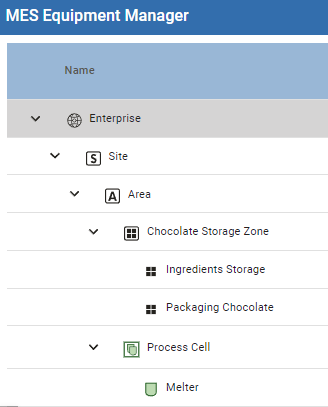
- In Equipment Manager, ensure that you have the needed items in the equipment tree. If not, add them.
|
Production Equipment Model - Process Cell and Unit are needed New to these concepts? See Batch Procedure Framework. In this how-to, there is a Storage Zone where ingredients are stored; These are not required for material tracing and are here just for this demonstration. The Unit is the piece of equipment where materials are processed. |
|
- To set up an Equipment Phase for the Unit and add Material_In and Material_Out parameters.
Do this:
-
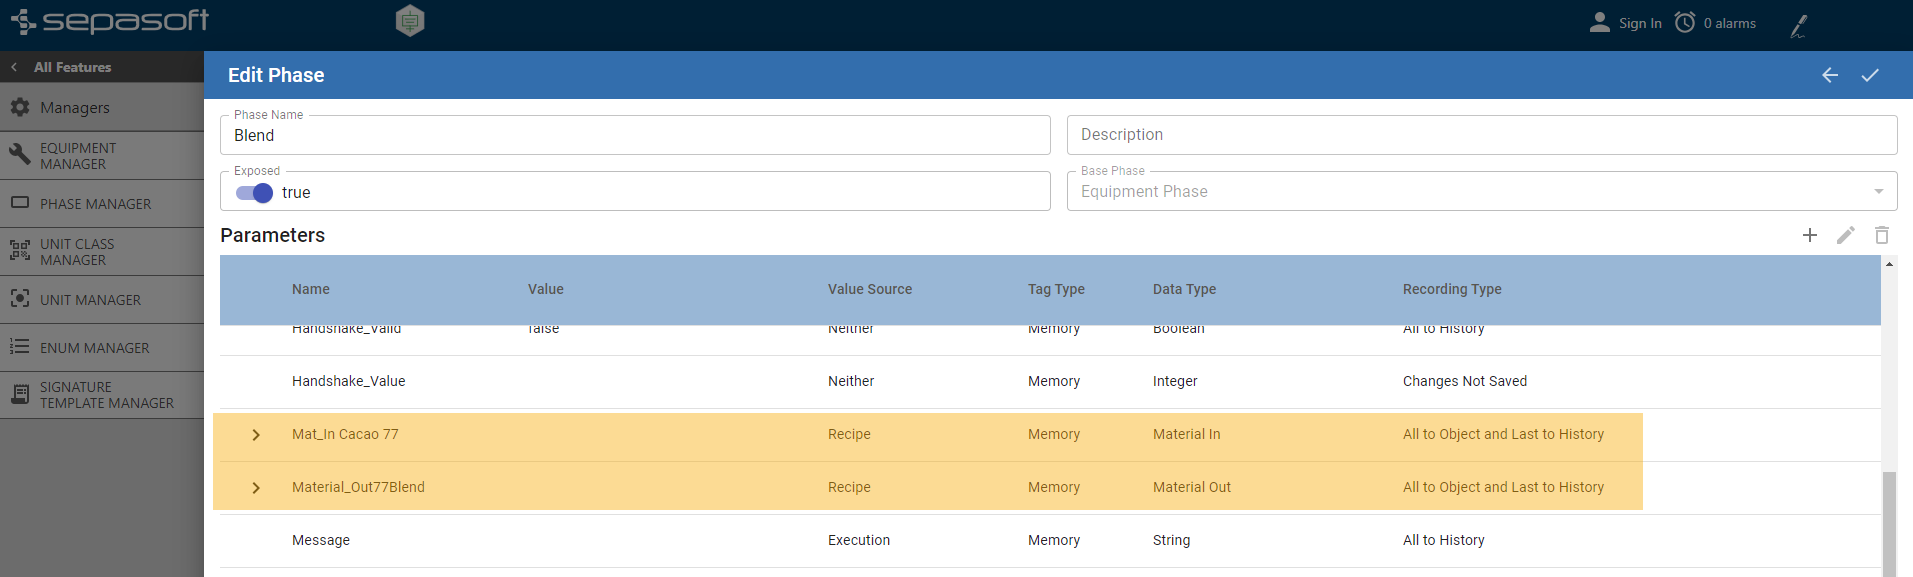
- In Phase Manager, create an Equipment Phase and set to Exposed.
-
- Add a one Material In parameter. Set the Data Type to Material_In.
- Next, configure the Material_In parameters in its sub-parameters. Expand the Material_In parameter to view its sub-parameters.
-
- Scroll down and set the following sub-parameters. These parameters provide flexibility in how material lots are configured, counted and traced. For reference documentation for configuring materials, see Material Lot Configuration in Material Resource Parameters | Batch Procedure.
-
-
-
Auto_Create_Lot = True
-
Auto_Select_Lot = False
-
Bypass_Quantity_Check = True
-
Auto_Create_Lot = True
-
-
- Set the Parameter Value of Lot_Equipment to the Ingredients Storage Zone.
-
Create a Material_Out parameter.
-
-
Lot_Equipment = Select path to: Ingredients Packaging Zone
-
Material_Name = Chocolate Blend
-
Lot_Status = Complete
Enum (Lot_Status)
-
Lot_Equipment = Select path to: Ingredients Packaging Zone
-
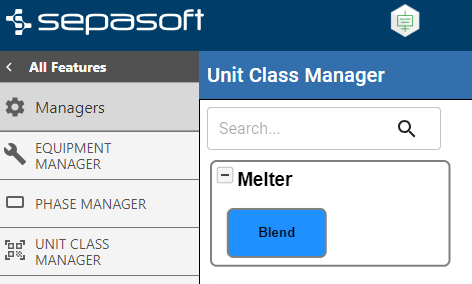
- In Unit Class Manager, add the Equipment Phase with the material-resource parameters to the Melter Unit Class.
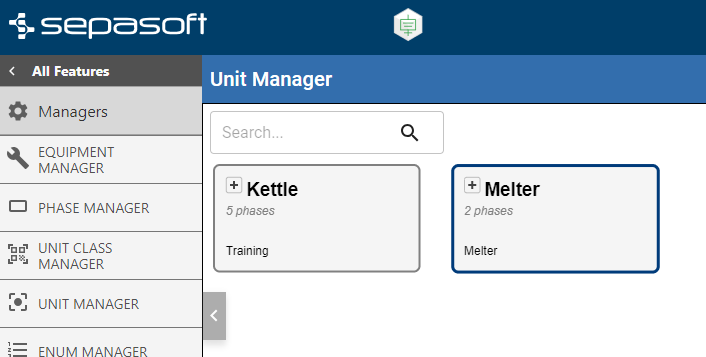
- In Unit Manager , drag and drop the Unit Class on the Unit to assign the phases to the equipment unit.
Step 3: Recipe Authoring and Running a Batch
Author a simple recipe with the required Unit Procedure for material tracking with that one equipment phase.
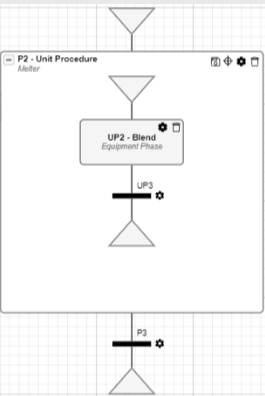
- In Recipe Editor, author a recipe:
-
- Add a Unit Procedure and set the Unit Class to the one with the equipment phase with material parameters.
- Validate and Save the recipe.
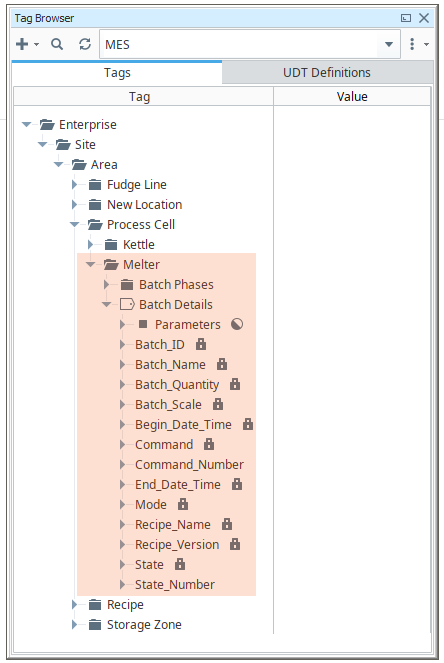
- We'll run a batch on this recipe. We need to mimic the PLC side of the communication. We can do this in the Ignition Tag Browser or the Batch Control. We will also be setting a few of the material sub-parameters during execution to mimic the material flow.
Next:
-
Navigate to Batch Execution List and add a batch:
- Select the material recipe.
- Enter 100 for Quantity.
Sitting Idle in Batch List

- Start the Batch.
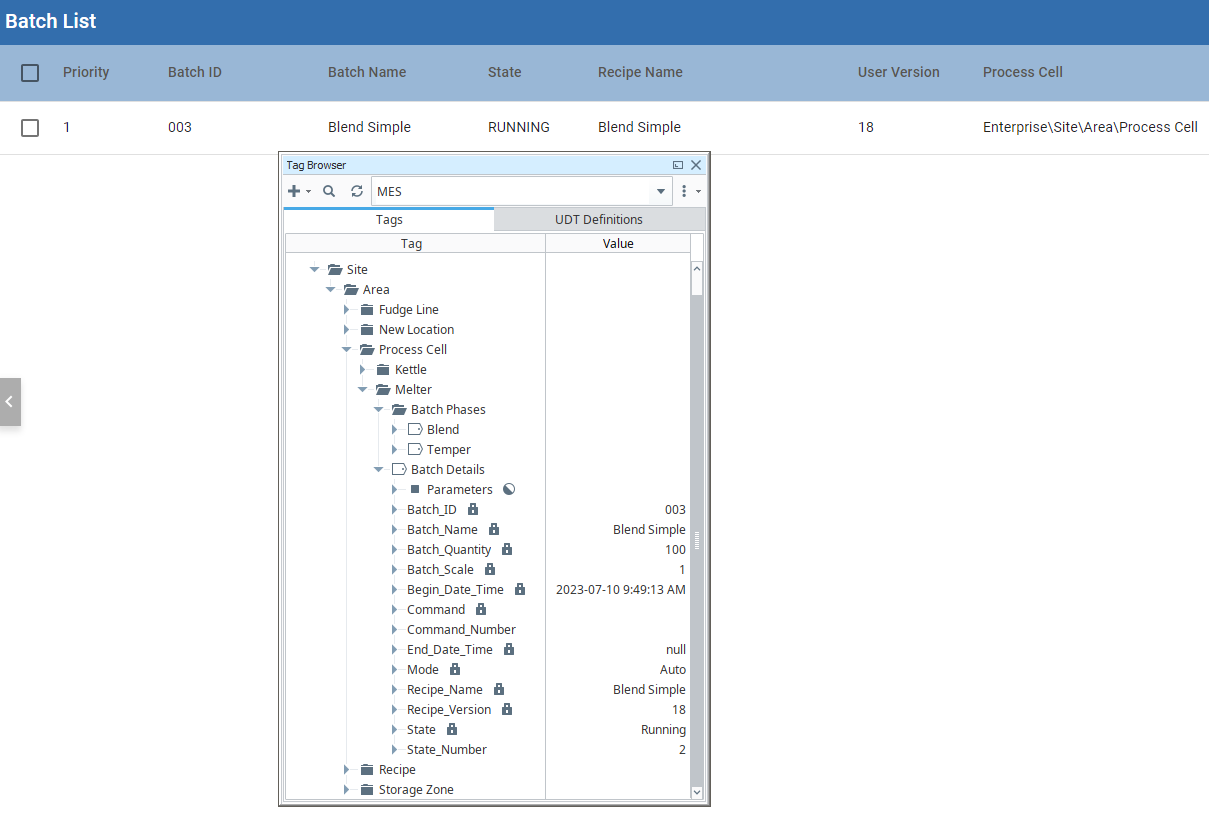
Go into the Blend phase and set Command to '1' and State to '2' - here you are mimicking the machine side of the communication. After the phase is running, values populate. There are several values still needed. Keep in mind that how and when these values are populated is determined by the system design.
-
Set the Material_In sub-parameters. You can do this in the Tag Browser or the Batch Recipe Monitor component:
- Actual_Quantity = 100 (must be 1 up to the target quantity)
- Lot_no = 10000 (any number) - Lot number is required when auto-creating lots.
-
Material_UOM = Case (any UOM is acceptable for this example)
- Now that the sub-parameters are set, trigger Record_Trace. Note that Record_Trace triggers automatically when all required values are provided:

-
Now set the Material_Out sub-parameters.
- Actual_Quantity
-
Lot_No
- Check the Record_Trace checkbox to trigger the trace.
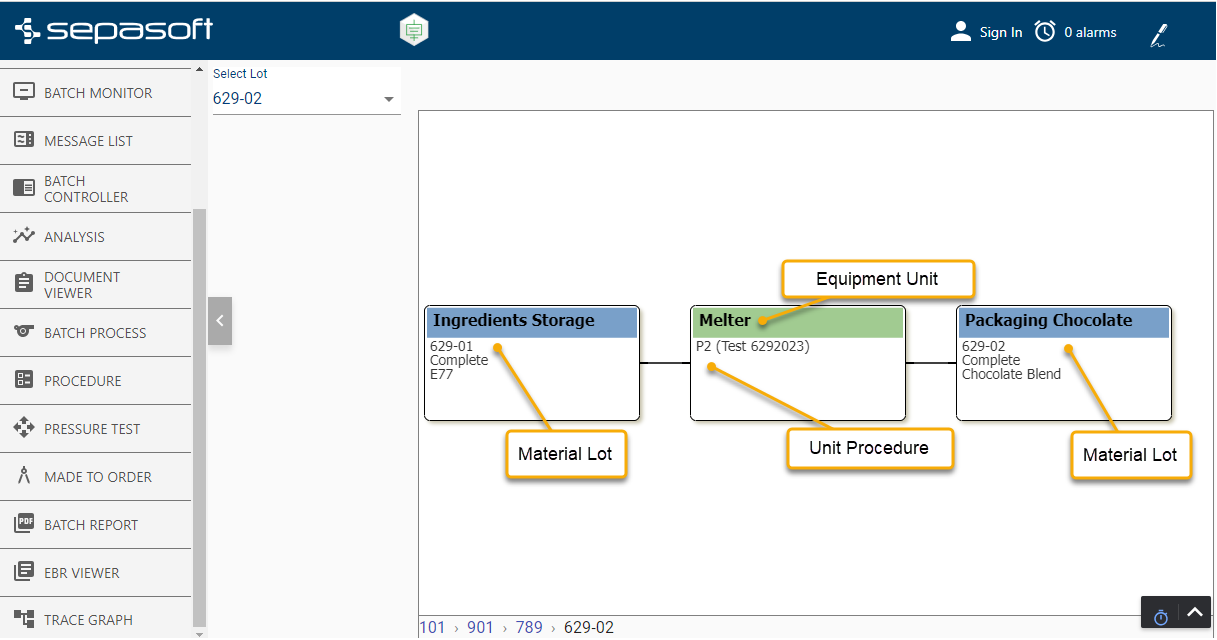
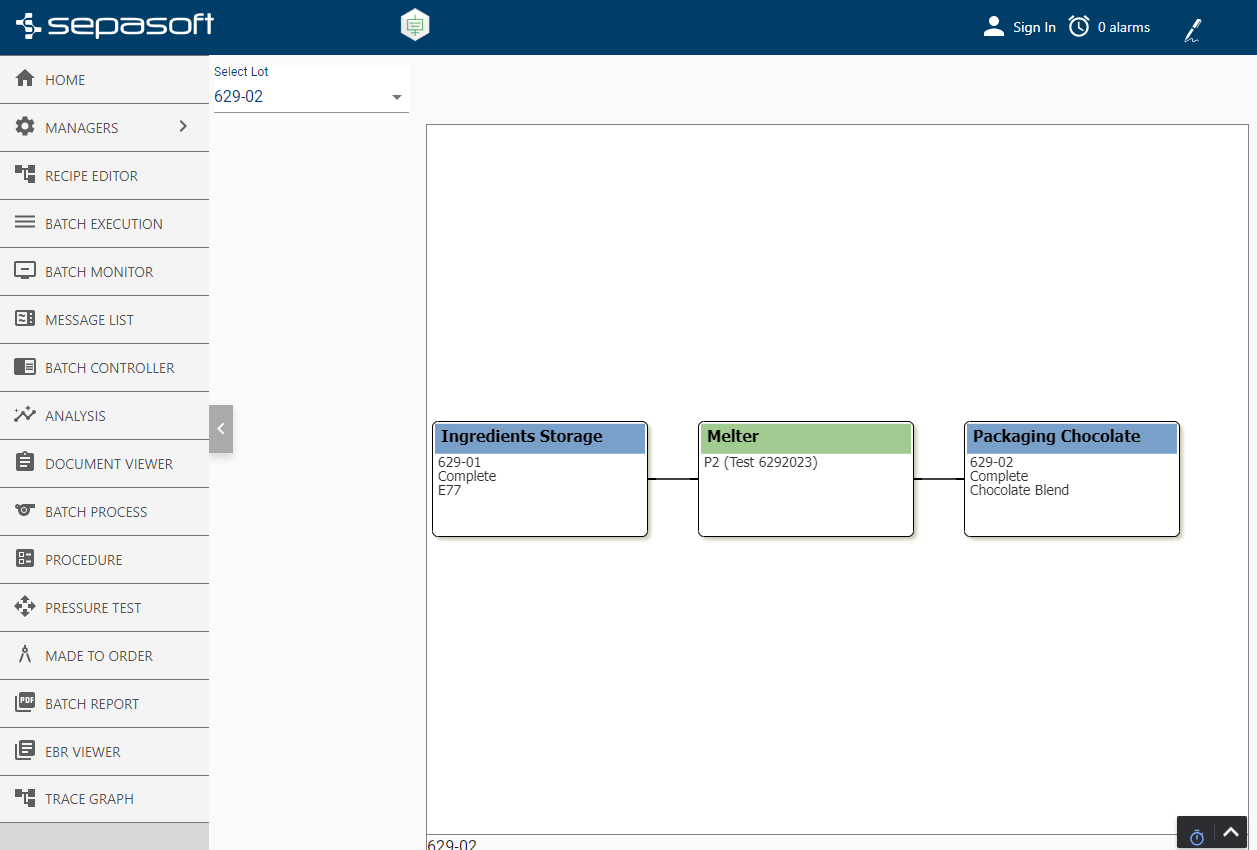
The batch ends. Take a look at the trace in the Trace Graph component.
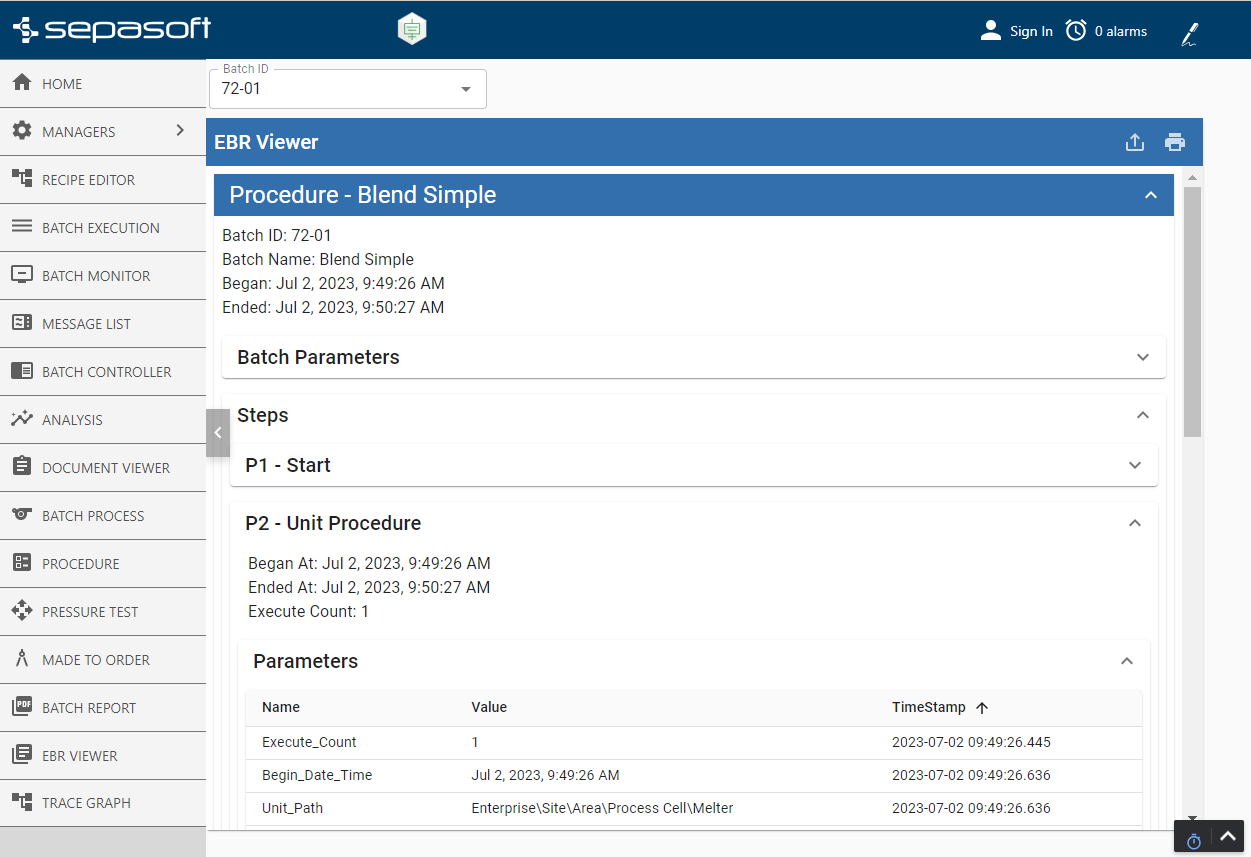
Also view in the EBR:
Sepasoft MES Module Suite