Sepasoft MES Module Suite
Using Batch Recipe Editor
The Batch Recipe Editor component is installed with the Batch Procedure module.
In Batch Recipe Editor:
- Author recipes
- Modify recipes
To learn how to author recipes, see Batch Recipe Authoring.
- Access Templates
Related Links:
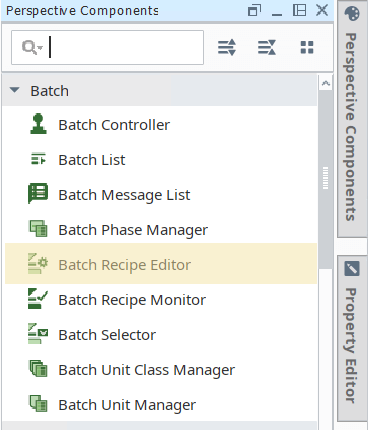
Adding Batch Recipe Editor in Ignition Designer
- In Ignition, with a Perspective View active in the Project Browser, go to the Perspective Component Palette and add the Recipe Editor component to the design space.
No additional configuration is required to start adding. See below on this page for more information.
Using Your Custom Phases

|
Built-In Phases are available in Recipe Editor by default. To use your custom phases, complete these steps:
|
Editing Phases in Batch Recipes
|
|
Updates to phases are not automatically reflected in Batch Recipes. To update a Batch Recipe with phase changes, open the Batch Recipe and save it. Doing this pushes the phase-configuration updates to the Batch Recipe. Keep in mind: The changes effected are additions of parameters and removals of parameters. However, if a value to a parameter is changed in the Batch Recipe, the value from the Phase will NOT update the value of the same phase in the recipe. |
Using Batch Recipe Editor
This is where you do the visual development for recipes and recipe templates.
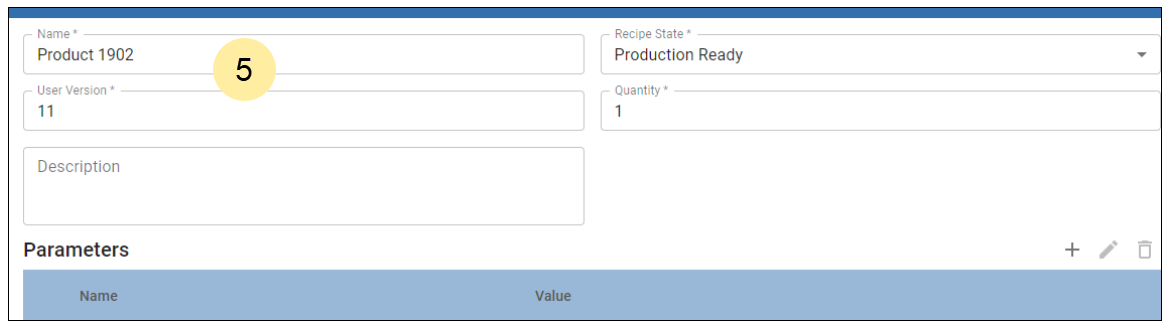
Clicking the config icon brings up the recipe header information.
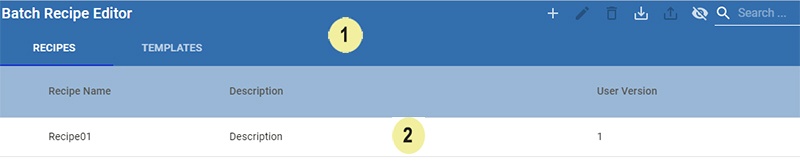
Batch Recipe Manager provides four main areas:
|
|
TOOL BAR These tools can be used for recipes and templates depending on the active tab. Plus icon: Use to add a recipe or template. Naming Convention
Sync and Save: Sync parameters to one or more formulas. Pencil icon: Use to edit a recipe or template. Select and click the edit icon. Trash icon: Use to delete a recipe. Note: You cannot delete a Recipe or Template Class with children recipes or templates. Export icon: Use to generate an XML file to save as a project asset.
Import icon: Use to bring in an XML file to build unit classes. Import as a Recipe: make the Recipe tab active Import as a Template: make the Template tab active. Eye icon: Show/hide columns |
||
|
|
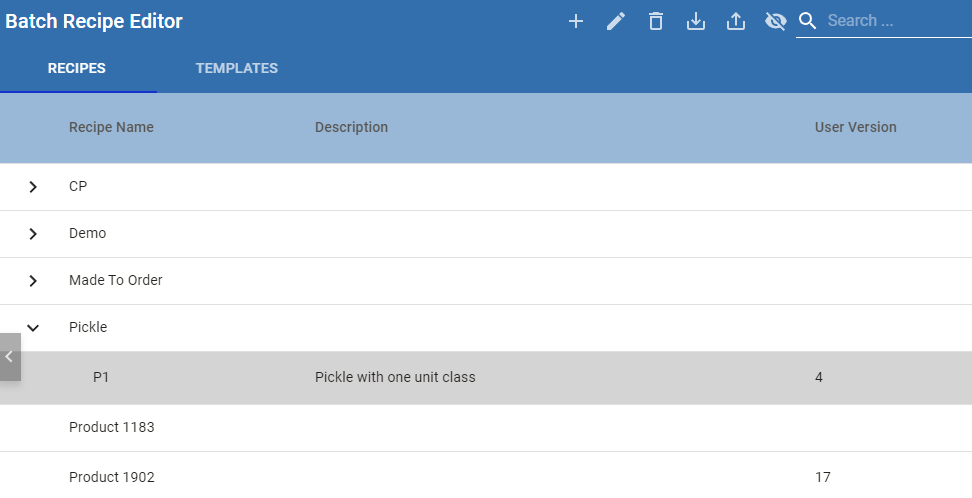
There are 2 tabs:
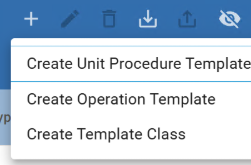
In the TEMPLATES tab, you can create a Unit Procedure Template or an Operation Template. You can organize templates into classes. In Batch Recipe Editor:
|
||
|
|
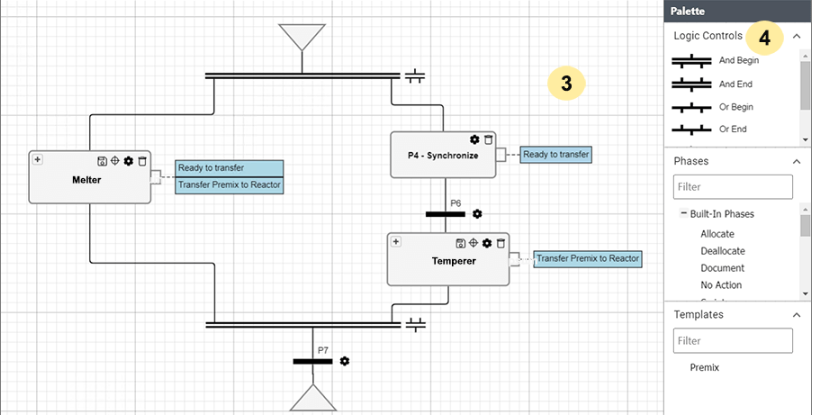
Design Space Using the tools, phases, and templates in the Palette, build a recipe. See Recipe Authoring. Design Toollbar Back Arrow: Leave the recipe without saving changes. Gear: Access the Recipe Header information, including receipe parameters. Checklist: Validate the Recipe structure and logic. This must be done before the recipe can be executed. SyncNSave: Sync any changed phases and parameters, validate, and save the recipe. Checkmark: Save the recipe without validating it. |
||
|
|
Palette Access logic controls, built-in and user-defined phases, as well as templates in the palette. |
||
|
|
Recipe header information Name: The name given to the recipe Recipe State: Enum list of recipe states that can be used to control editing User Version: system increments this number on save Quantity: Can be used to scale recipes. Note: Unit of Measure (UOM) for materials is added to the Material In resource parameter. Description: Recipe description |


Sepasoft MES Module Suite